
How to Defrag and Optimize Drives in Windows 10
Disk defragmentation is an essential process that should be performed every once in a while in all of your hard drives. This is because they become fragmented with use, i.e. saved data is located in disperse positions in the disk, and thus accessing data becomes slower and inefficient. To deal with this problem, disk defragmentation re-allocates saved data in an optimized way so as to make data access faster.
This process was always integrated into Windows, and in this article we'll describe how you can use it in Windows 10.
There are two ways you can perform disk defragmentation:
Method 1: Optimize Disks Using the Built-in 'Optimize Drives' Tool
Method 2: Optimize Disks Using the Command Prompt
You can click on either of the above links to jump to the corresponding method, instead of scrolling through the article.
Method 1 - Optimize Disks Using the Built-in 'Optimize Drives' Tool
This is the most common way to defrag your disks.
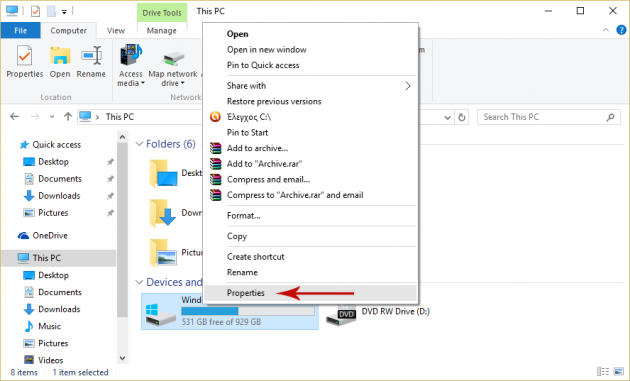
Step 1: Open the Drive's Properties Window
Open This PC in File Explorer, right-click on any drive and click on Properties.
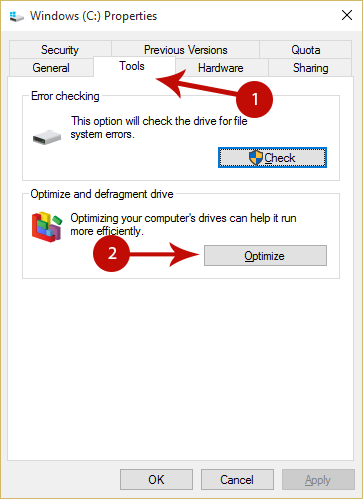
Step 2: Select 'Optimize'
In the Properties window, navigate to the Tools tab, and then click the Optimize button.
Step 3: Analyze and Defrag Drives
The current window will allow you to select any drive and analyze it in order to compute the fragmentation percentage,
before performing the actual defragmentation process. If the fragmentation percentage is above 10%, then the disk should be defragmented. In this case, just select the disk and click the Optimize button.
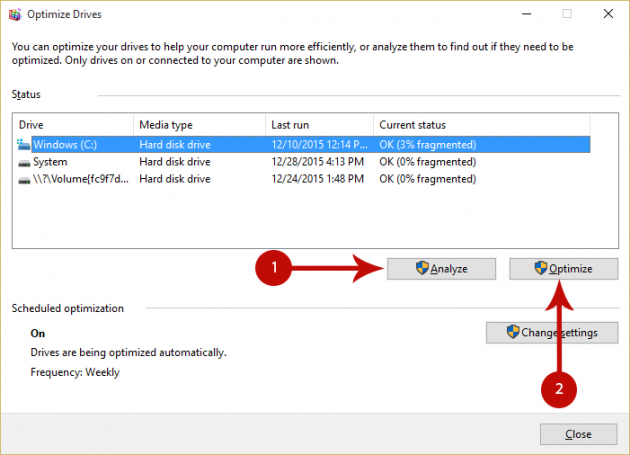
The duration of the process depends on the size of the disk and the level of fragmentation (it can take anywhere from a few minutes to a few hours to finish).
Method 2 - Optimize Disks Using the Command Prompt
With this method you can defrag disks using the command prompt.
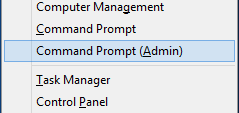
Step 1: Open an Elevated Command Prompt
First, open an Elevated Command Prompt.
Step 2: Type Defrag Command
To perform the defrag operation on a disk, you can simply type the following (replace C with the corresponding letter of the disk that you wish to defrag):
defrag C: /O

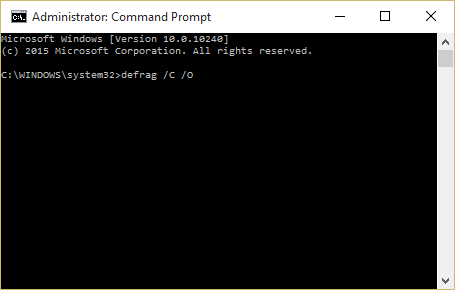
Alternatively, if you wish to defragment all HDDs and SSDs, type the following:
defrag /C /O
If you are amore advanced user, you can include several other parameters too. The general syntax is as follows:
defrag <volumes> | /C | /E <volumes> [<task(s)>] [/H] [/M [n] | [/U] [/V]] [/I n]

Where <task(s)> is omitted (traditional defrag), or as follows: /A | [/D] [/K] [/L] | /O | /X

Or, to track an operation already in progress on a volume: defrag <volume> /T
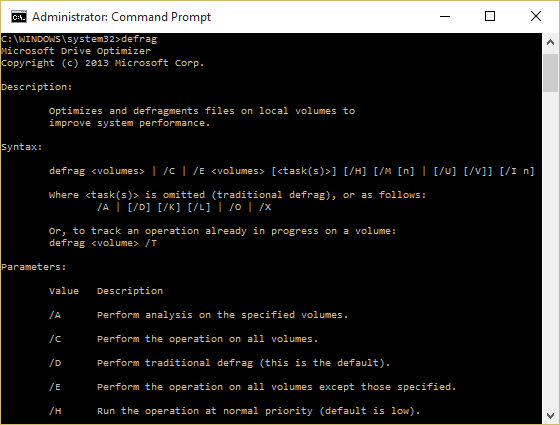
And the available parameters are:
| Parameter | Description |
| /A | Perform analysis on the specified volumes. |
| /B | Perform boot optimization to defrags the boot sector of the boot volume. This will not work on a SSD. |
| /C | Perform the operation on all volumes. |
| /D | Perform traditional defrag (this is the default). |
| /E | Perform the operation on all volumes except those specified. |
| /H | Run the operation at normal priority (default is low). |
| /I n | Tier optimization would run for at most n seconds on each volume. |
| /K | Perform slab consolidation on the specified volumes. |
| /L | Perform retrim on the specified volumes. Only for a SSD. |
| /M [n] | Run the operation on each volume in parallel in the background. At most n threads optimize the storage tiers in parallel. |
| /O | Perform the proper optimization for each media type. |
| /T | Track an operation already in progress on the specified volume. |
| /U | Print the progress of the operation on the screen. |
| /V | Print verbose output containing the fragmentation statistics. |
| /X | Perform free space consolidation on the specified volumes. |
Note however that there is no need to use any command other than the aforementioned ones, unless you have a specific reason to do so.
Once the operation is done, you disk(s) will be optimized! If you have any questions, suggestions or problems, then don't hesitate to post in the comments section below!
[Credit: Shawn Brink from TenForums]
Bonus
If you're not into built-in tools for this job, then do check out third-party software defrag tools like Defraggler (free), Auslogics Disk Defrag (free), Puran Defrag (free), O&O Defrag (paid).