
How to Record Clips or Take Screenshots with Game Bar in Windows 10
The Xbox App is a wonderful app for those who have Windows 10 and an Xbox One console, since the integration between the two (done with the Xbox app of course) is seamless. We recently talked about how you can stream your Xbox One games to your Windows 10 PC/tablet, as well as how to enable 1080p image quality when streaming.
Today we’re going to talk about how you can record videos and take screenshots of any app or game with the Game bar- something like an extension in the Xbox app, with the original purpose of recording videos and capturing screenshots during gameplay.
You can click on the links below to jump to a particular topic, instead of scrolling through the article:
- Record Videos with Game Bar
- Take Screenshots with Game Bar
- Use the “Record that” Feature in Game Bar
Record Videos with Game Bar
With Game bar you can record clips of any app or game, and of any length. The clips are saved in MP4 format.
Follow the instructions below to start recording:
Step 1: Open App or Game you Want to Record
First of all, the app or game you want to record must be the currently active window- otherwise the Game bar will record another app.
Step 2: Open Game Bar
Press Win + G (“Win” is the Windows key in your keyboard) to open Game bar. It’s probably going to ask you for confirmation if it’s the first time you open Game bar with this specific app or game (“Do you want to open Game bar?”), so check the “Yes, this is a game” option to proceed.

Step 3: Start Recording
Now it’s time to start recording! Just press Win + Alt + R (“Win” is the Windows key in your keyboard) or click on the Record button in Game bar to start recording.

In order to stop the recording, press Win + Alt + R again or click on the Record button in Game bar.
Step 4: Watch the Recorded Clip
When you stop the recording, a notification will appear informing you that the clip is recorded. Clicking on it will open the Xbox app and take you to Game DVR > On this PC, from where you can watch the clip.
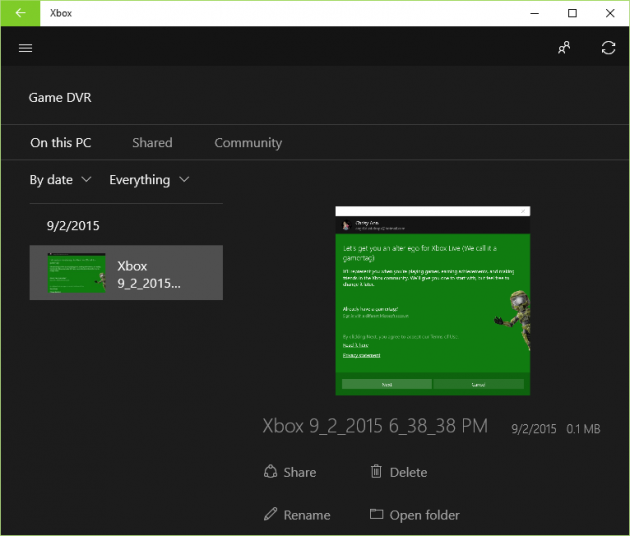
The folder that all Game bar recordings and screenshots are saved to is Captures, located inside the Videos folder (C:\Users\USER\Videos\Captures – replace USER with the current user).
Capture Screenshots with Game Bar
With Game bar you can take screenshots of any app or game, which are saved in PNG format. Here is how you can take a screenshot:
Step 1: Open App or Game you Want to Take Screenshot Of
It’s important for the app or game you want to take a screenshot of to be the currently active window- otherwise the Game bar will capture a screenshot of another app.
Step 2: Open Game Bar
Press Win + G (“Win” is the Windows key in your keyboard) to open Game bar. If you haven’t opened Game bar with this specific app or game before, it will ask for confirmation first (“Do you want to open Game bar?”), so check the “Yes, this is a game” option to proceed.
Step 3: Take Screenshot
Press Win + Alt + PrtScn or click the Screenshot button in game bar to take a screenshot.

Step 4: View Screenshot
A notification will appear informing you that your screenshot is saved. Clicking on it will open the Xbox app and take you to Game DVR > On this PC, from where you can see the captured screenshot.
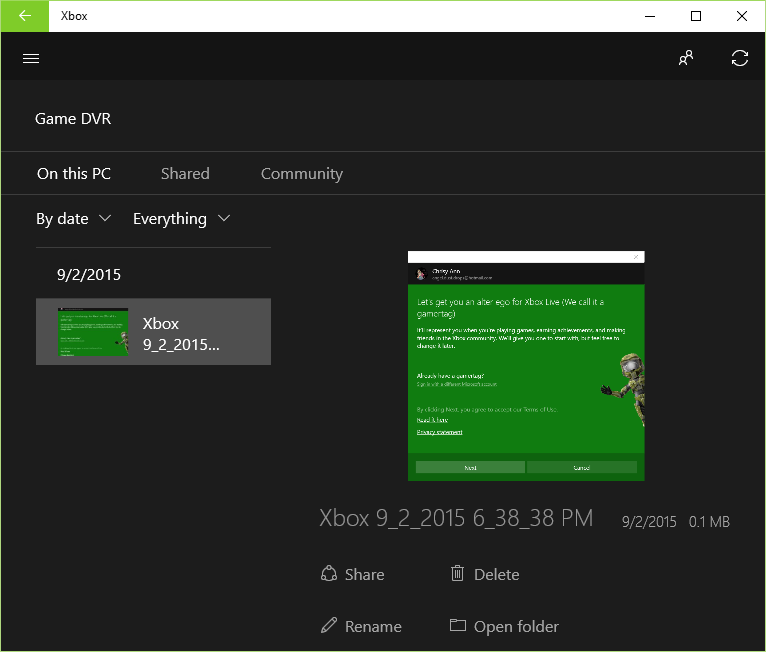
The file is saved in the Captures folder inside the Videos folder (C:\Users\USER\Videos\Captures – replace USER with the current user).
Use the “Record that” feature in Game Bar
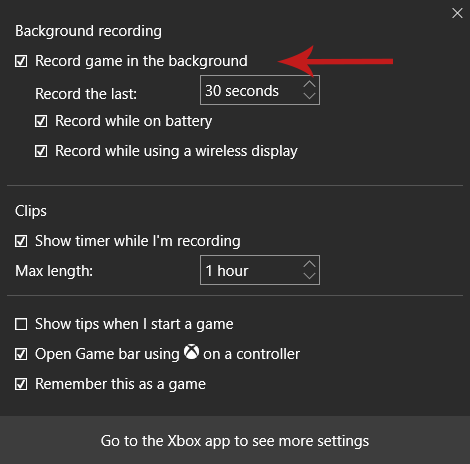
The “Record that” feature allows you to save the last 30 seconds of an app or game. It works by recording continuously in the background, and saves the last 30 seconds (the length can be changed) when this feature is used.
Step 1: Enable Background Recording
Press Win + G (“Win” is the Windows key in your keyboard) to bring up Game bar, and then click on the Settings button to open the settings menu. From there, make sure that the Record game in the background option is checked. You can also change the duration of the clip here.
If background recording is enabled, then you can skip this step next time.
Step 2: Open App or Game you Want to Record
It’s important for the app or game you want to record to be the currently active window- otherwise the Game bar will record another app.
Step 3: Open Game Bar
Press Win + G to open Game bar. It’s probably going to ask you for confirmation if it’s the first time you open it with this specific app or game (“Do you want to open Game bar?”), so check the “Yes, this is a game” option to proceed.
Step 4: Use “Record That”
Once the application is running, press Win + Alt + G or click on the Record that button in Game bar to use the feature.

A notification will pop up and tell you that the clip has been recorded. Clicking on it will open the Xbox app and take you to Game DVR > On this PC and show you the recording.
The file is saved in the Captures folder inside the Videos folder (C:\Users\USER\Videos\Captures – replace USER with the current user).