
How to Fix the "Search Not Working" Issue in Windows 10
The new search in Windows 10 seems to be fast and efficient, although sometimes it becomes a bit unstable. If you use it a lot, then you might have noticed that sometimes it stops working; you might type something in the search box but no results come up, and the only thing that’s displayed is the “Searching” animation.
The typical solution for this issue is to reboot your computer- but that’s really inconvenient for plenty of reasons. So what can you do to fix this problem, apart from rebooting? There are two methods you can follow to do that (Method 1 is recommended since it's guaranteed to work, while Method 2 might not identify the problem):
Method 1 (Recommended): Killing the Cortana Process
Method 2: Using the Search and Indexing Troubleshooter
Fixing the “Search Not Working” Issue in Windows 10
The root of the issue is unknown, but there are two solutions for it.
Method 1 (Recommended): Killing the Cortana Process
If you have disabled Cortana in the past, then you might have noticed that it’s still running in the background since it's connected to Windows search. Just open the Task Manager and locate a process named Cortana to confirm this. All you have to do in this method is kill this process, which will be restarted again immediately by Windows, and the search feature will be fixed.
Here is the process, step-by-step:
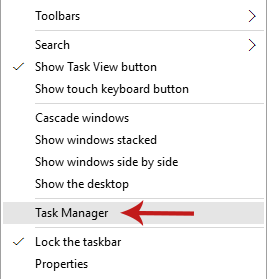
1. Press Ctrl + Shift + Esc, or right-click on the taskbar and select Task Manager, to open the Task Manager.
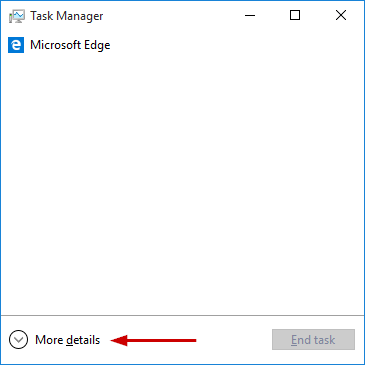
2. In the Task Manager click on More Details to view the full list of running processes.
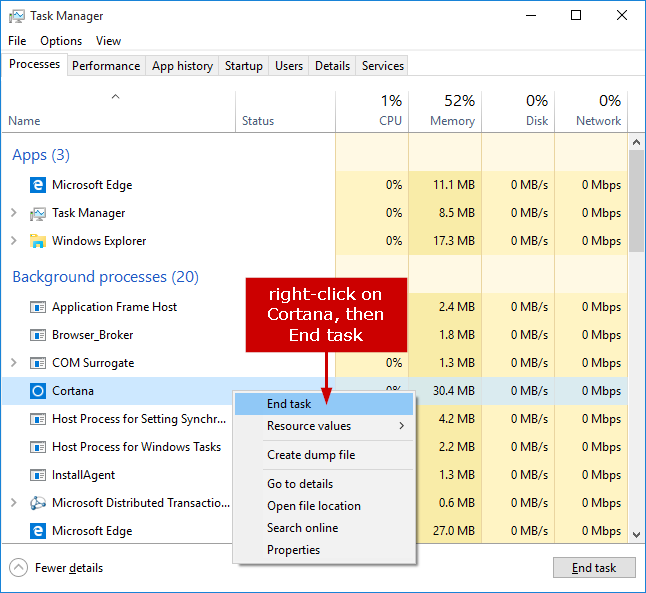
3. Under the Processes tab, locate the process named Cortana.
4. Right-click on the Cortana process and select End task. Once the process is killed, Windows will start it again and it will appear on the list of running processes shortly after.
5. Try to use the search function now. It works, right?
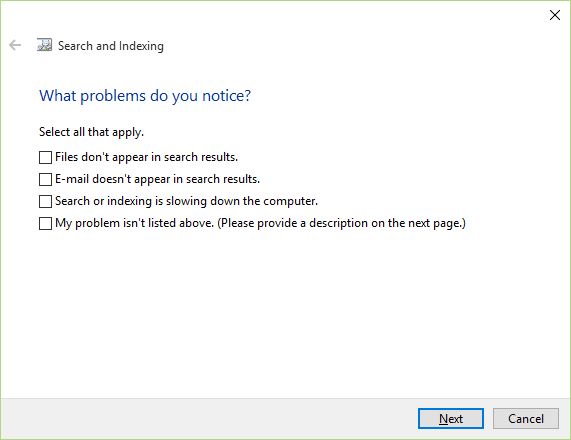
Method 2: Using the Search and Indexing Troubleshooter
The Search and Indexing Troubleshooter can identify and fix the problem for you. Here’s how to run it:
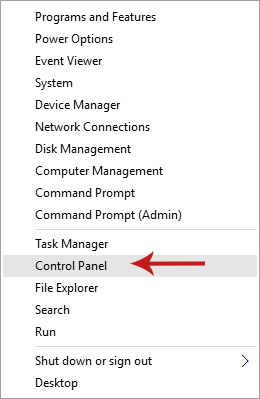
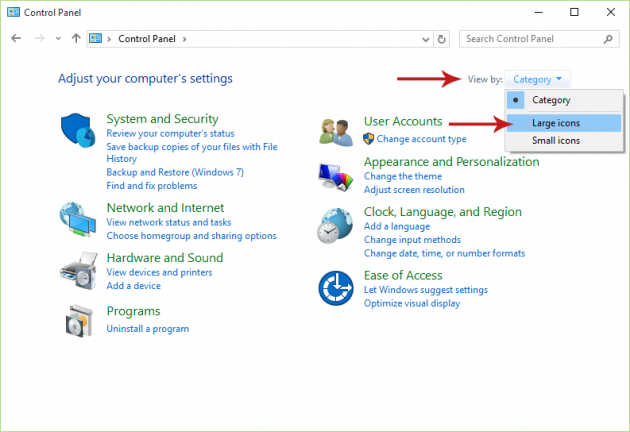
1. Right-click on Start and select Control Panel from the context menu.
2. In the Control Panel, click on View by link located at the top right area of the window, and select Large icons.
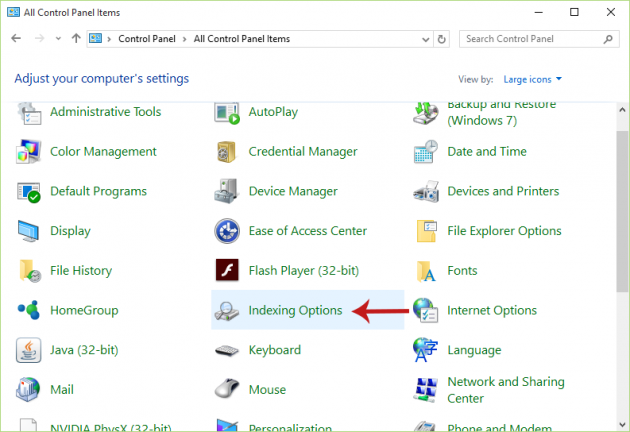
3. From the features that are shown, find and select Indexing Options.
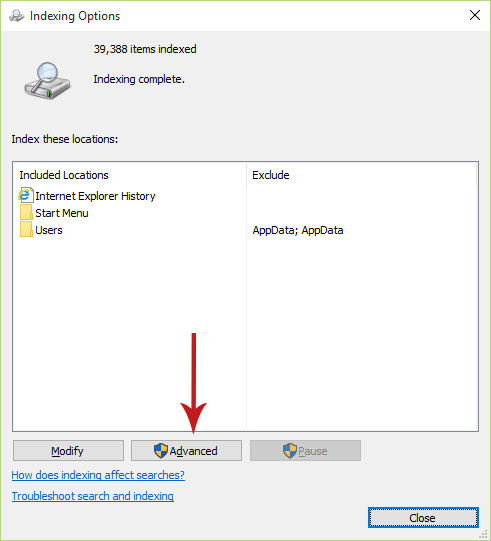
4. In the window that opens, click the Advanced button to open one more window.
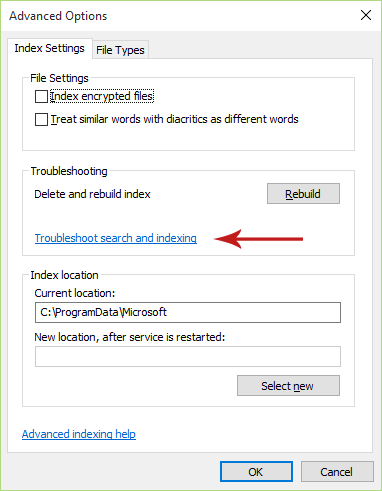
5. Click on Troubleshoot Search and Indexing, which will open the troubleshooter.
6. Follow the instructions in order to let the troubleshooter identify and fix your issue.
7. After the troubleshooter has resolved the problem, try using the search function again to confirm that it works.
[Credit: ghacks.net]
Did the two methods help you fix the issue? If not, let us know and we’ll try to help you out!