
How to Change the DPI Scaling Level in Windows 10
Some users have reported that they have problems with their displays in Windows 10, and require to adjus the DPI scaling level in order to make everything appear smaller or bigger. Even if you do not have a specific issue with your display, you might find that changing the default value for the DPI scaling level is more comfortable. Otherwise, you might want to change only the Title Bar text size.
So here is how you can configure the DPI scaling level in Windows 10. For easier navigation, you can click on the links below to jump to a specific method in the article:
Method 1 (Recommended): Change DPI Scaling Level for Each Display in Settings
Method 2: Change DPI Scaling Level for All Displays in the Control Panel
Method 3: Change DPI Scaling Level for All Displays by Tweaking the Registry
The first method is recommended, since you have the ability to set a custom DPI scaling level for each display seperately, plus it's the easiest.
Method 1 (Recommended) - Change DPI Scaling Level for Each Display in Settings
This method will allow you to select another value for the DPI Scaling level for each display separately.
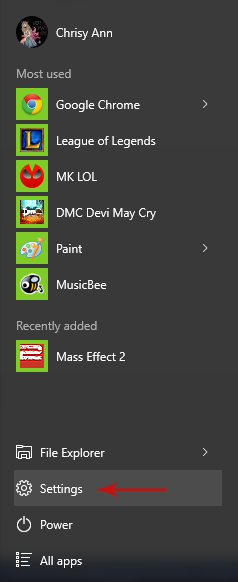
Step 1: Go to Settings
Open the Start menu and select Settings.
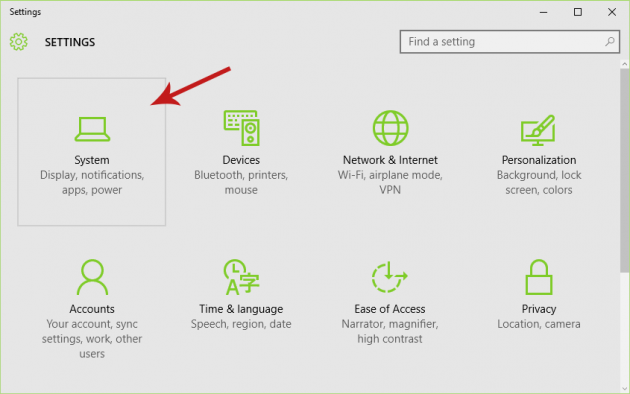
Step 2: Navigate to System Settings
In the Settings screen, select the System icon.
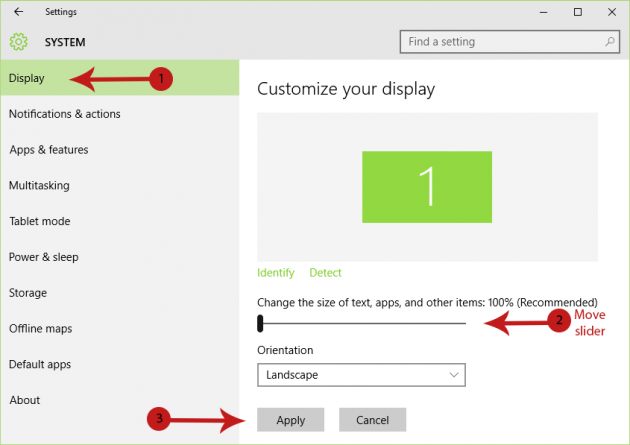
Step 3: Change DPI Scaling Level Per Display
The Display item in the sidebar is where the setting we’re looking for is located. First, select from the top of the window the display you want to change the DPI scaling level of (if you have more than one monitors connected to your PC), and then move the slider located under the Change the size of text, apps, and other items heading. The default value is 100%, so increase it or decrease it to make items on the screen bigger or smaller respectively. When you’re done, hit Apply to save changes (you’ll be asked to sign out and then sign back in to apply changes).
Method 2 - Change DPI Scaling Level for All Displays in the Control Panel
This method will change the DPI scaling level for all displays (unlike Method 1, in which you changed it for each display separately).
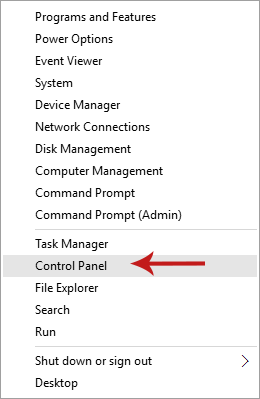
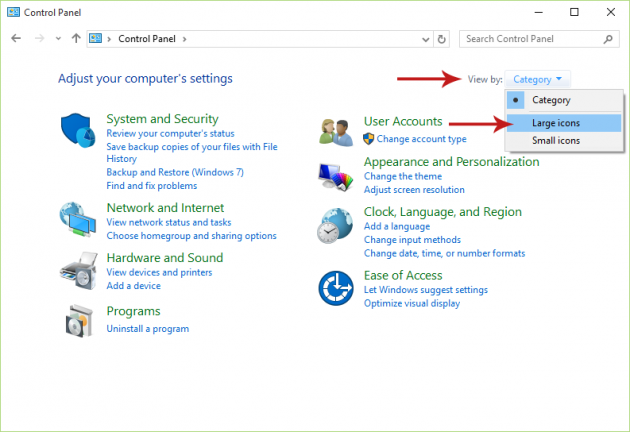
Step 1: Open the Control Panel
Right-click on the Start menu or press Win + X (“Win” is the Windows button in your keyboard), and then select Control Panel.
Step 2: Change to Icons View
Click on the View by link at the top right corner of the window, and select Large icons.
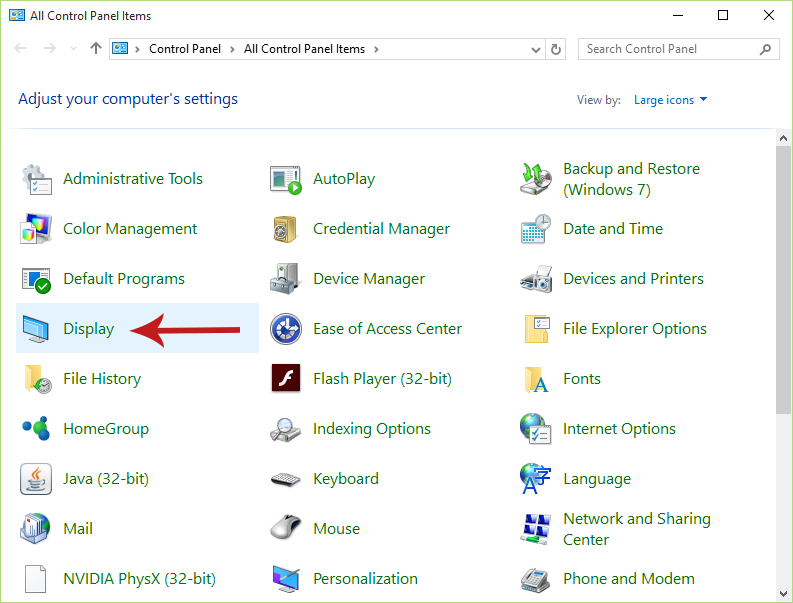
Step 3: Go to Display Settings
Select the Display icon.
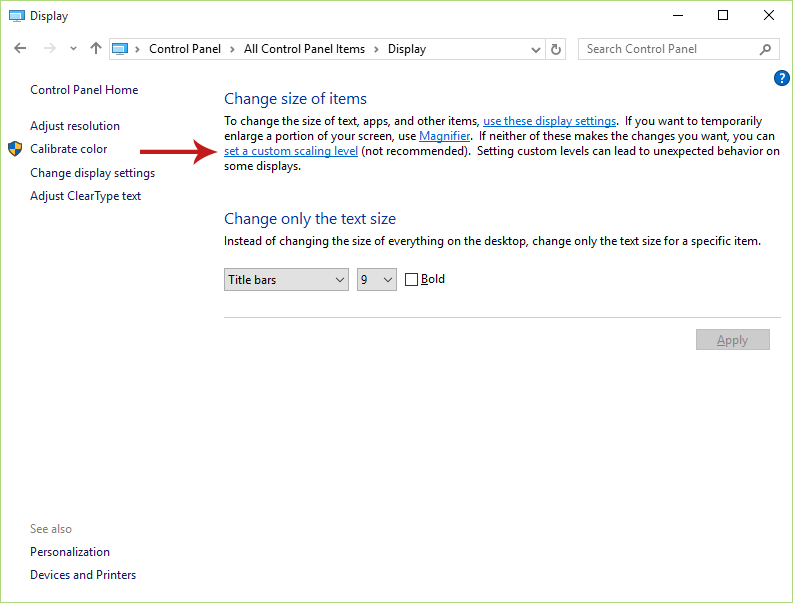
Step 4: Click ‘Set a Custom Scaling Level’
In the Display settings window and under the Change size of items heading, click on the ‘set a custom scaling level’ link.
Step 5: Change DPI Scaling Level
In the Custom sizing options window, move the ruler to the left or right to change the DPI scaling level and make items smaller or bigger respectively.
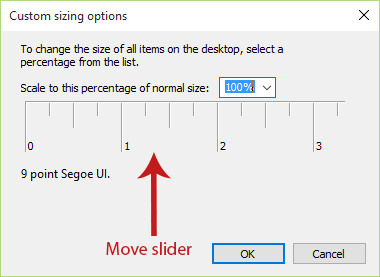
Alternatively, you can click on the percentage dropdown menu above the ruler to set a specific value for the DPI scaling level.
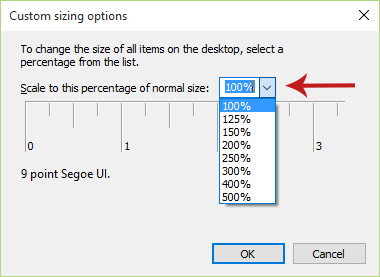
Click OK when you’re done, and then click Apply in the Display settings window to save changes (you will be asked to sign out and then sign back in before the new setting is applied).
Method 3 - Change DPI Scaling Level for All Displays by Tweaking the Registry
This works the same way as Method 2 (i.e. changes the DPI scaling level of all displays); only that now we’ll tweak the registry instead of doing it from the Control Panel.
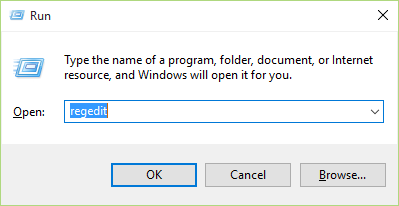
Step 1: Open the Registry Editor
Press Win + R (“Win” is the Windows key in your keyboard) to open the Run dialog box, type “regedit” in it (without quotes) and press Enter to open the Registry Editor.
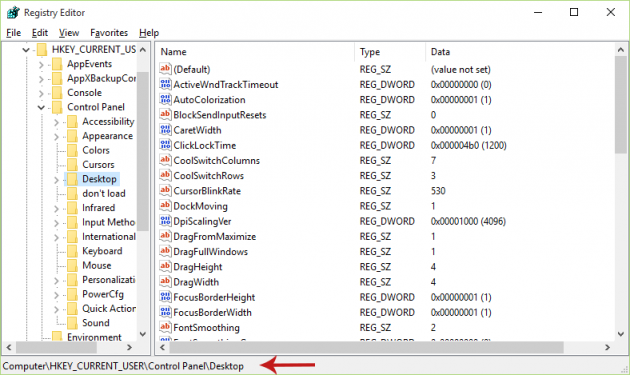
Step 2: Navigate to the Correct Registry Key
From the left pane in the Registry Editor, navigate to the following registry key:
HKEY_CURRENT_USER\Control Panel\Desktop
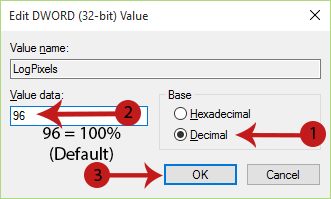
Step 3: Edit the ‘LogPixels’ DWORD Value
In the Desktop key, locate the LogPixels registry value. If it doesn’t exist, create it (right-click anywhere on the empty space and choose New > DWORD (32-bit) Value, then rename the new value to LogPixels).
Then double-click on it to open a new dialog, where you’ll have to change the Base setting to Decimal first, and afterwards edit the Data field to any of the following values that correspond to particular percentages:
|
DPI Scaling Level |
Registry Data Value |
|
Smaller 100% (default) |
96 |
|
Medium 125% |
120 |
|
Larger 150% |
144 |
|
Extra Large 200% |
192 |
|
Custom 250% |
249 |
|
Custom 300% |
288 |
|
Custom 400% |
384 |
|
Custom 500% |
480 |
Click OK when you’re done, sign out and then sign back in to see the changes.
[Credit: Shawn Brink from TenForums]
If you have any questions or issues, let us know and we'll help you out!