
How to Resume a Failed Windows 10 Installation Media Creation
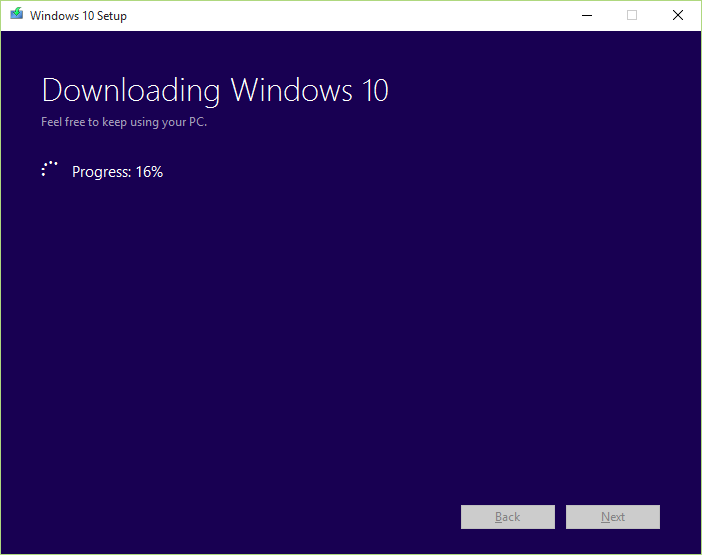
If you belong to the category of users who tried to download Windows 10 ISO with the help of the Media Creation Tool, because you wanted to create a bootable USB drive for installing Windows 10 for example, then it's not improbable that the creation of the installation media after the download fails. Perhaps a power failure occurs at some point, and it's reasonable that you don't want to download the whole thing again (which is over 3 GB). So, what are you going to do if that happens? Will you have to download that giant file and wait for the installation media to be created all over from the beginning again? The answer is no.
Fortunately, the good developers at Microsoft have provided a somewhat hidden feature in the Media Creation Tool that allows resuming an unfinished creation of the installation media (a bootable USB drive or an ISO file) after the data has been downloaded. Note that this is different than resuming the download of Windows 10 via the Media Creation Tool; read Note 2 for more details.
Resuming a Failed Windows 10 ISO Installation Media Creation
First of all, to reach this point it means that you have already followed this tutorial and have downloaded the Media Creation Tool, which you used in order to download the Windows 10 ISO files. Well, during the download process, the Media Creation Tool saves all downloaded data into a hidden folder, and packs it up when the download is finished.
Therefore, follow the steps below to find the hidden folder and resume the download operation:
Step 1: Show Hidden Files and Folders in Windows Explorer
What you need to do first is enable the option in Windows Explorer that shows hidden files and folders. To do that:
Windows 8/8.1 and 10
Users running Windows 8/8.1 and 10 can follow this guide to show hidden files and folders.
Windows 7
1. Open Folder Options by clicking the Start button > Control Panel > Appearance and Personalization > Folder Options.
2. Click the View tab.
3. Under Advanced settings, click Show hidden files and folders, and then click OK.
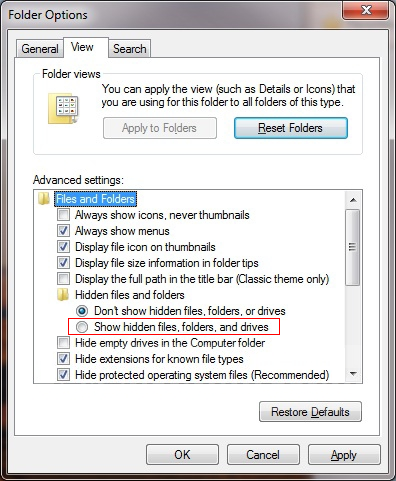
Hidden files and folders will be shown by now.
Step 2: Find and Run the Executable Responsible for Resuming the Download
Now that hidden files and folders are displayed, go to the following directory (assuming C is the drive in which Windows is installed):
C:\$Windows.~WS\Sources\Windows\sources
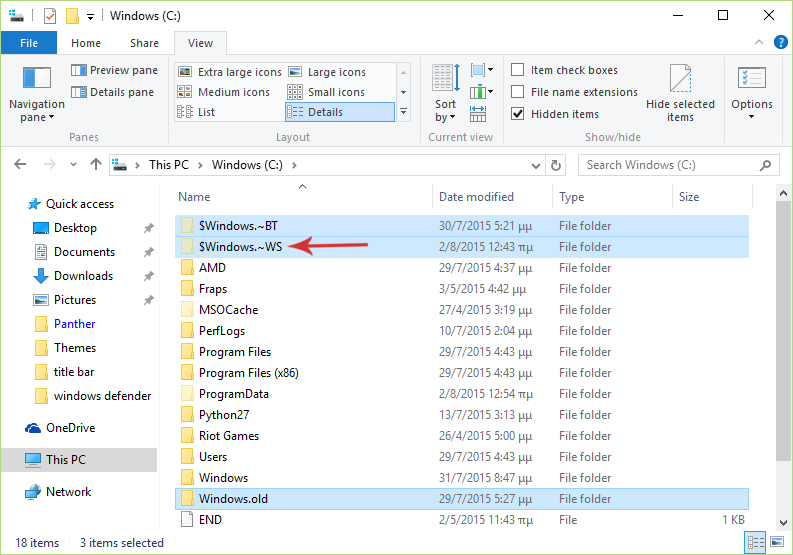
In this folder, locate a file named setupprep.exe. Simply double-click on that file to run it; the Media Creation Tool will open and resume the process from where it was left!
As you can see, this is a very easy procedure and will certainly save you a lot of time, instead of re-downloading the whole file again from the start.
Some Notes
Note 1: After the whole process finishes successfully (the data is downloaded and the bootable USB drive/ISO file has been created), there is a chance that the downloaded data in the hidden folder is not removed, resulting in consumption of extra space in your drive. Therefore it's wise to delete the $Windows.~WS folder after you have obtained the ISO file.
Note 2: Unfortunately there is no way to resume the download itself, if it is interrupted. The above method works only in the scenario where the download has already finished, and the Media Creation Tool is in the process of creating the installation media.
Do you have any questions, thoughts or suggestions that you would like to share with us? Let us know in the comments section below!
Setupprep.exe is nowhere to be found.
Where do I go from here ?
PS: I am showing hidden files & folders as well as hidden system files.
Thanx