
How to fix 'Update Requested' problem and other errors you encounter when updating to iOS 8
Just a few days after the release of the new iPhone 6, on 17th of September, came the iOS 8 update which holds many new features and surprises for its users. However many people would come across the “Update Requested” error when trying to update their iOS devices to iOS 8, which leads them to frustration and worrying. Don’t worry though, in this article we’ll see how to bypass this problem and get your device updated to iOS 8.
“Update Requested…”
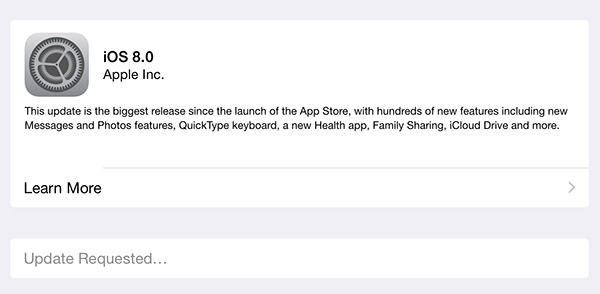
First of all, you should know that there’s nothing wrong with your device or your internet connection that doesn’t allow the update to be downloaded and installed. When you go to “Settings > General > Software Update”, the update process will either begin immediately or you’ll face the problem described above. What causes this issue is the large amount of traffic that asks for the update from Apple’s servers at the same time; in order to handle all these requests, Apple decided to create a new queuing system that doesn’t allow immediate download of the update from their servers until a user’s turn comes. So if you have the patience to wait a few minutes or up to several hours then just relax and let the system handle this.
If on the other hand you can’t wait to check out iOS 8, then you should try out those two methods that have been reported to work and start downloading the update at once:
Method 1
Well perhaps you’re not going to like this one, but doing a hard reset of the device will remove you from the queue- you can then try to update the device again. To do a hard-reset of the device hold the Home button and Power button simultaneously until the device turns off and on again. If you don’t mind having your photos, apps and data deleted (you should always have a backup of your data somewhere, preferably not in the iCloud though). If the hard reset trick doesn’t work the first time, give it another go before you move on to the second method.
Method 2
This method is much easier and is generally preferred since it doesn’t require a hard reset or the deletion of data. How it works? Just use iTunes to update your device instead of updating it wirelessly. Here’s how to do that:
- Make sure that iTunes is updated to the latest version (in the menu bar click on “iTunes > Check for updates”).
- Plug the USB cable that’s connected to your iOS device in to the computer.
- In the top-right corner of the window there’s a device button (left of the iTunes Store button). Click on it to view the details of the connected device.
- Click on the “Check for updates” button located next your device’s details. A popup message will appear and tell you that the new update (8.0) is available, so click on “Download and Update” in order to proceed with the operation.
- Before the main installation procedure takes place you’ll have to click “Update” when a popup message appears and asks you to verify with Apple, and then click “Next” and “Agree” when the release notes popup appears.
- Let the program download the update file; it might take a while depending on your internet connection (the file’s size is about 1-2 GB big). After the download is complete, the contents of the file will be extracted and installed in the device, which should reboot once or twice during the whole process. The “Hello” screen will appear when the update is successfully completed.
- Follow the on-screen instructions in the device and enjoy iOS 8!
Some users have had issues in step 4, in which case they are told that an update is not available for their device. No worries! Just download manually the IPSW files of iOS 8.0 from here for your device. Then, open iTunes and use the “Restore” option:
Hold down the Shift button (on Windows) or the Alt button (on Mac) and click on the “Restore” button. Locate the IPSW file you downloaded in the window that will open and let the update process begin.
Other Errors When Updating
You might experience other errors when trying to update to iOS 8 instead of the “Update Requested”. For instance, you might come across one of the following messages when trying to update:
-
“Preparing Update…”
-
“Software Update Failed. An error occurred downloading iOS 8.0.”
-
“The iPad software update server could not be contacted. Make sure your network settings are correct and your network connection is active, or try again later.”
The two methods we explained above will solve those issues, but also make sure that you have a lot of space in your device for the update to be extracted and installed (even though the update is less than 2 GB big, you still need at least 4 GB free space for a successful update) and also check that your device is compatible with the new update. The devices compatible with iOS 8 are:
- iPhone 4s, 5, 5c, 5s, 6, 6 Plus
- iPad 2, 3rd generation, 4th generation, Air, mini, mini with Retina display
- iPod Touch 5th generation
On the contrary, the following devices are not compatible with iOS 8:
- iPhone (original), iPhone 2G, 3G, 3GS, 4
- iPad 1st generation
- iPod Touch 1st, 2nd, 3rd and 4th generations
If your device is compatible with iOS 8, and you have already updated to it, then let us know your thoughts about it! Some say that the battery usage is quite high in this update. What do you think?