
What is Wi-Fi Sense and How to Enable It in Windows 10 PC and Mobile Devices
One of Microsoft’s new feature implementations in Windows 10 that never existed before is Wi-Fi Sense. What this does is connect your Windows 10 device automatically to near Wi-Fi hotspots that are either open or have been shared with you by your contacts. It’s a very interesting feature, especially if you visit the same places with your contacts, so let’s see in detail what else there is to it and how to enable it.
So, below are 4 topics regarding Wi-Fi Sense and how you can enable it in Windows 10 and Windows 10 Mobile. You can click on the links to jump to a particular topic in the article.
What is Wi-Fi Sense Exactly?
Enabling Wi-Fi Sense in Windows 10 PC from the Settings (Your Account Only)
Enabling Wi-Fi Sense in Windows 10 PC by tweaking the Registry (All Accounts)
Enabling Wi-Fi Sense in Windows 10 Mobile Phone
What is Wi-Fi Sense Exactly?
Wi-Fi Sense can automatically connect you to open Wi-Fi networks it knows about by crowdsourcing networks that other people using Windows have connected to. These are typically open Wi-Fi hotspots you see when you're out and about. Additionally, it can automatically connect you to Wi-Fi networks that your Facebook friends, Outlook.com contacts, or Skype contacts have shared with you after you've shared at least one network with you conetacts. When you and your contacts share Wi-Fi networks wth each other, you give each other Internet access without having to tell each other your passwords. No networks are share automatically.
As you can see, with Wi-Fi Sense users can connect to access points without having to know and enter a password. Once you enable Wi-Fi Sense and share a network, then its password is sent over an encrypted connection and is stored in an encrypted file on a Microsoft server. Afterwards, it is sent over an HTTPS connection to your contacts’ devices that use Wi-Fi Sense.
It’s up to you to decide which networks you want to share- there are no restrictions to it. Also, although you cannot determine which of your contacts will have access to your shared networks, you can give access to contacts from selected social networks (Outlook.com contacts, Skype contacts and Facebook friends). Note that only your own contacts get access to your shared networks, and not their contacts.
In order to get access to shared networks, you have to share yours too. More particularly, you have to share at least one network with your contacts in order to be able to connect to theirs. If you turn off the option to share your networks, then you’ll also stop having access to your contacts’ shared networks as well.
In order to use Wi-Fi Sense, you have to be signed in with your Microsoft account. Also, enterprise networks that use the 802.1X standard cannot be shared (Wi-Fi Sense will ignore those networks).
Enabling Wi-Fi Sense in Windows 10 PC from the Settings (Your Account Only)
It’s fairly easy to enable Wi-Fi Sense in your computer. Here’s how to do so:
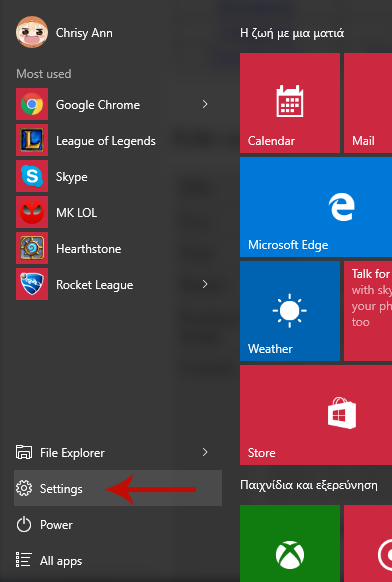
Step 1: Go to Settings
Open the Start menu and select Settings.
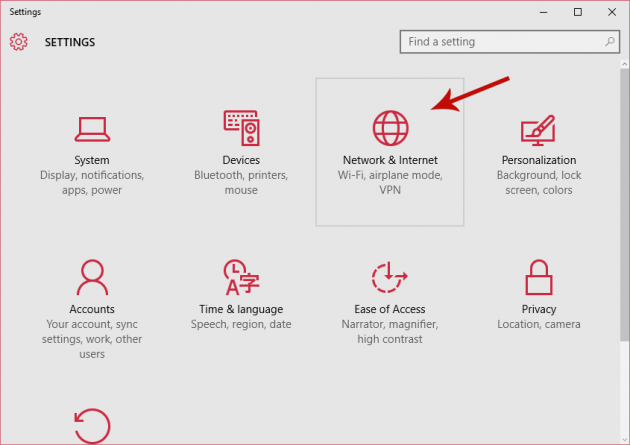
Step 2: Select “Network & Internet” Option
From the Settings window select the Network & Internet option.
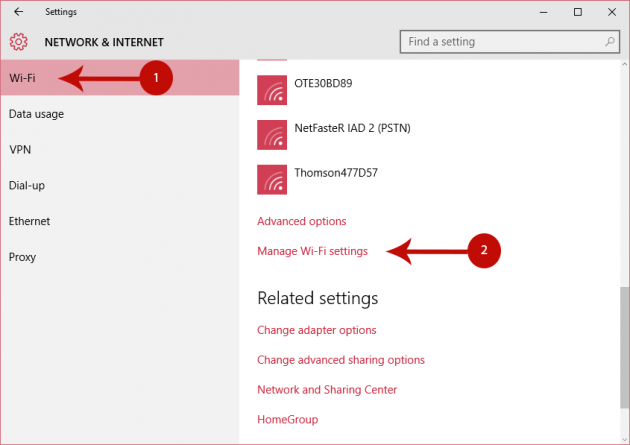
Step 3: Navigate to “Manage Wi-Fi Settings”
In the Network & Internet settings, select Wi-Fi from the sidebar on the left and then click Manage Wi-Fi settings.
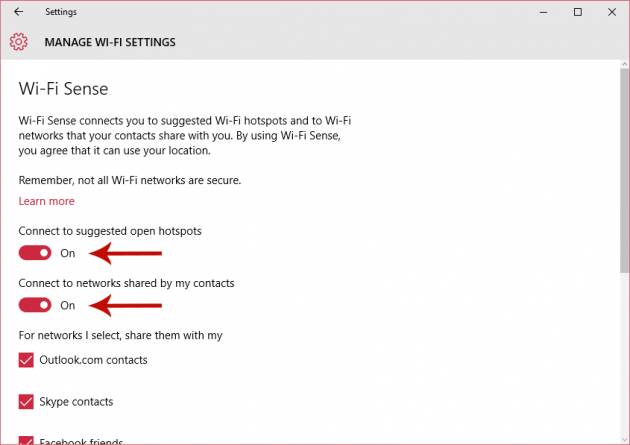
Step 4: Turn on Wi-Fi Sense
Wi-Fi Sense consists of two features- one for connecting to suggested open hotspots, and one for connecting to networks shared by your contacts. So, to enable one or both of those features, just move any of the following two sliders accordingly, as shown in the screenshot below:
- Connect to suggested open hotspots
- Connect to networks shared by my contacts
Step 5: Select Users to Share Your Networks With
If you have enabled the second option (Connect to networks shared by my contacts), then you will see below 3 checkboxes that you can enable in order configure which social network contacts will have access to your shared networks:
- Outlook.com contacts
- Skype contacts
- Facebook friends

Check the boxes that correspond to your preference, and close the window.
Step 6: Select Networks to Share with Your Contacts
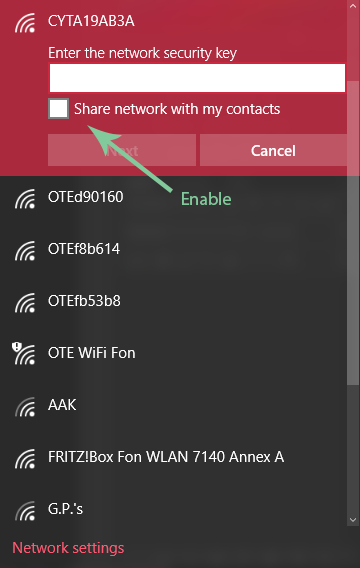
Now with Wi-Fi Sense enabled, you can choose which networks you want to share by simply enabling the “Share network with my contacts” checkbox when you enter the security key for the particular network.
Enabling Wi-Fi Sense in Windows 10 PC by Tweaking the Registry (All Accounts)
Here is how you can enable or disable Wi-Fi Sense for all user accounts in the computer, by tweaking the registry:
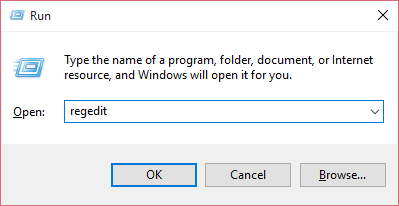
Step 1: Open the Registry Editor
Press Win + R (“Win” is the Windows key in your keyboard) to open the Run dialog box, type “regedit” in it (without quotes) and press Enter to open the Registry Editor.
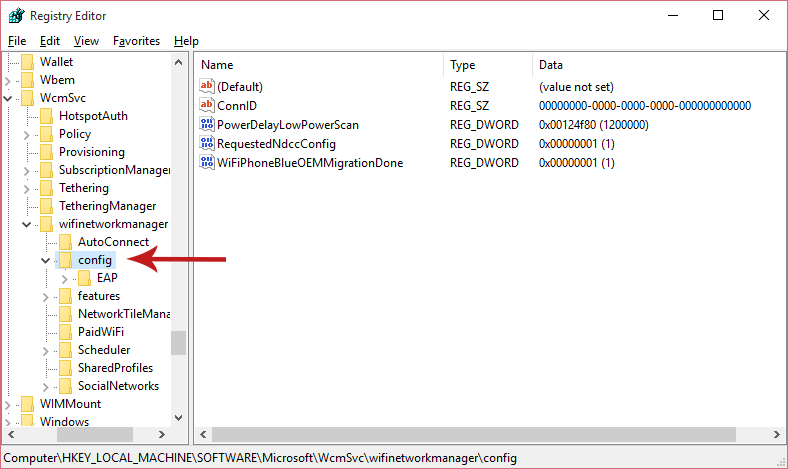
Step 2: Navigate to the Appropriate Registry Key
From the left pane in the Registry Editor, go to the following directory:
HKEY_LOCAL_MACHINE\SOFTWARE\Microsoft\WcmSvc\wifinetworkmanager\config
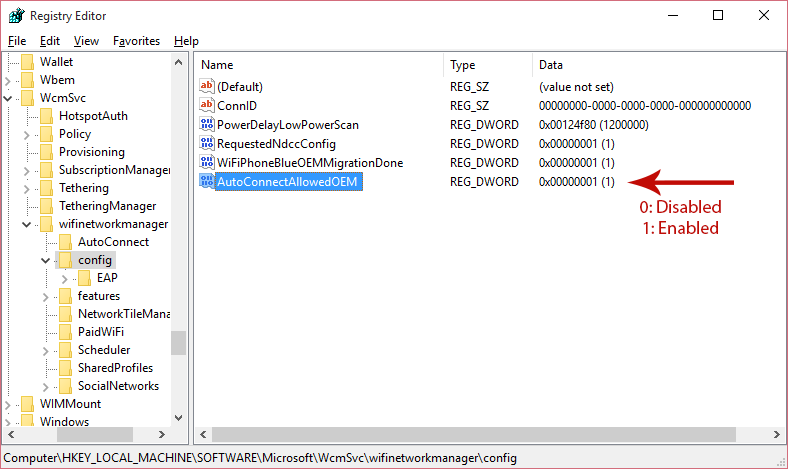
Step 3: Create a New DWORD Value
Right-click anywhere on the empty space in the Registry Editor and choose New > DWORD (32-bit) Value. This DWORD will be named as New Value #1 and will have a default value of 0. Rename the DWORD to AutoConnectAllowedOEM, and then change its value to 1 if you want to enable Wi-Fi Sense for all users, or leave it to 0 if you want to disable it for all users (right-click on it > Modify... and type 0 or 1 in the Value data box, then click OK).
That’s it, now all user accounts will have the same setting for Wi-Fi Sense.
If you don’t want to mess with the Registry Editor, then you can use the reg. files we provide below. Just download the one that corresponds to the setting you want to apply, double-click on it and click Yes in the confirmation message that appears.
Enable Wi-Fi Sense for All Users.reg
Disable Wi-Fi Sense for All Users.reg
Done!
Enabling Wi-Fi Sense in Windows 10 Mobile Devices
Here is how you can enable Wi-Fi Sense in your Windows 10 Mobile device:
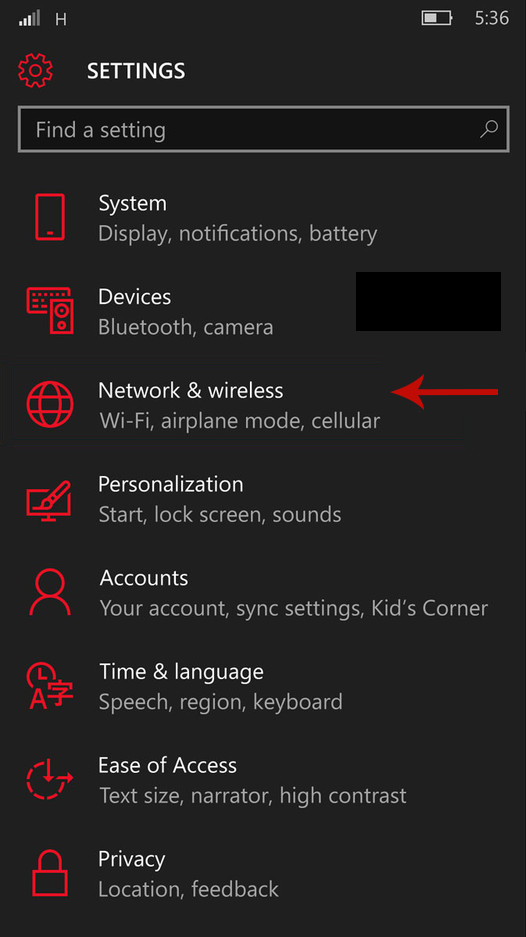
Step 1: Go to “Network & Wireless” in Settings
Open the Settings menu and tap on Network & wireless.
Step 2: Navigate to Wi-Fi Sense Settings
Tap on Wi-Fi, and then tap on the Wi-Fi Sense button.
Step 3: Enable Wi-Fi Sense
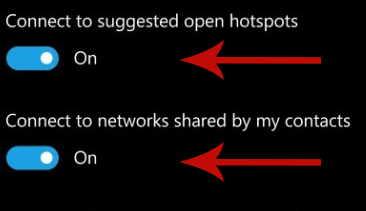
Now there are two available options that you can enable:
- Connect to suggested open hotspots
- Connect to networks shared by my contacts
The first one turns on the Wi-Fi Sense option for connecting to open access points, and the second one is for connecting to Wi-Fi access points shared by your contacts.
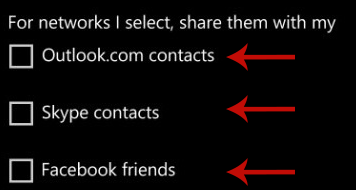
Step 4: Select Users to Share Your Networks With
If you have enabled the "Connect to networks shared by my contacts" option, then you will see 3 checkboxes below it. You can share your networks with contacts from the following social networks by checking their corresponding checkboxes:
- Outlook.com contacts
- Skype contacts
- Facebook friends
Step 5: Share Networks with Your Contacts
Next time that you connect to a network, check the "Share network with my contacts" checkbox when entering the security key, and it will be added to your list of networks you share with Wi-Fi Sense.
If you have a question or suggestion, let us know in the comments section below!