
How to remove Skype ads
In the beginning of 2014 Skype decided it was time to further promote its ads, and started displaying them in a place where Skype users could always see them - that place is none other but the Skype chat window itself. Now, whenever a user is chatting he will surely notice the ads displayed at the top of the chat window, above the profile picture of the user he's chatting with.
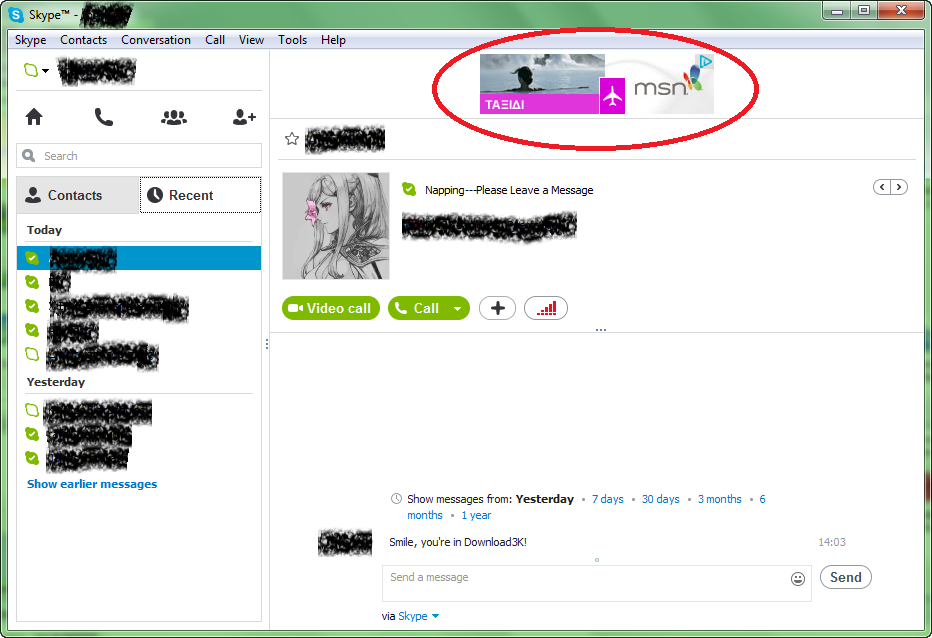
A lot of Skype users didn't take this well at all. The newly appeared ads were taking up a considerable amount of space in the window (that space in my own 10-inch netbook was quite important as I could see only a few a lines of text) and bothersome, let alone the fact that they were just making the place ugly. Since there's no setting to disable them and the only official answer that the Skype team was willing to give was to revert back to older versions of Skype, unsatisfied users started looking for practical ways of removing those ads and of course, they succeeded.
But enough with the history lessons - let's see the two easiest ways to block those annoying ads. Note that applying either of those two methods we present here will also block Skype's home page too (the one that lists recent status updates from friends and displays several other advertisements). That's probably a good thing for a lot of people.
Method 1 (through the Control Panel)
- Open the Control Panel (Start menu -> Control Panel).
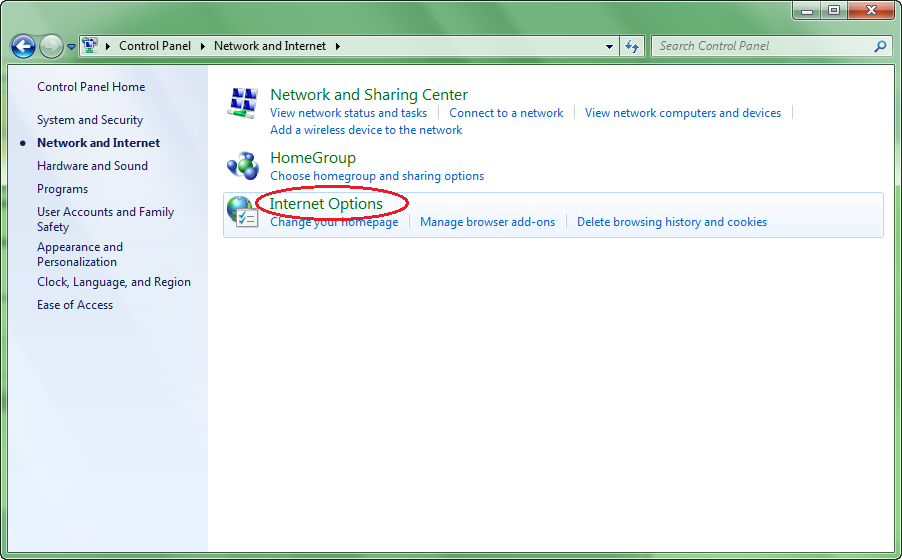
- From there go to Network and Sharing and click on Internet Options (XP users can open Internet Options directly).

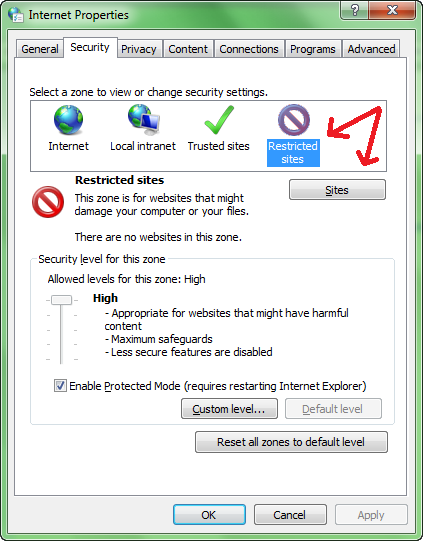
- In the window that opens, go to the Security tab and then click on the Restricted sites icon. Then click on the Sites button below.
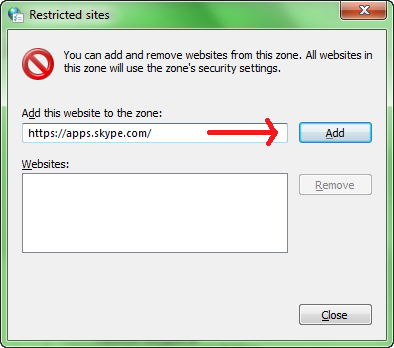
- Another window will open with a textbox at the top- in there you will need to paste this: https://apps.skype.com/ and click Add. Afterwards click Close and apply changes in the previous window.
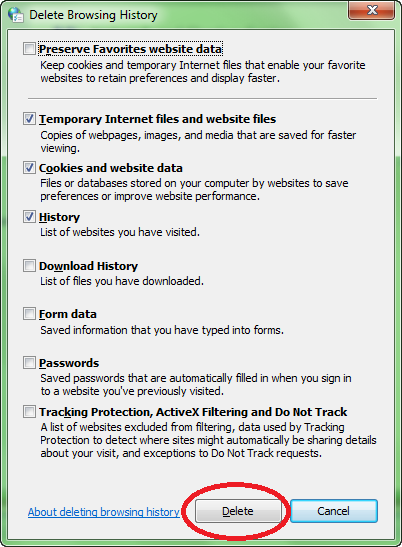
- Go to the General tab, click Delete and then Delete again. Close all open windows when the process is finished.
- Restart Skype for the changes to take effect, and you'll notice that the ads have been removed.
Method 2 (by editing the hosts file)
This method is a bit more complicated, but still easy to follow.
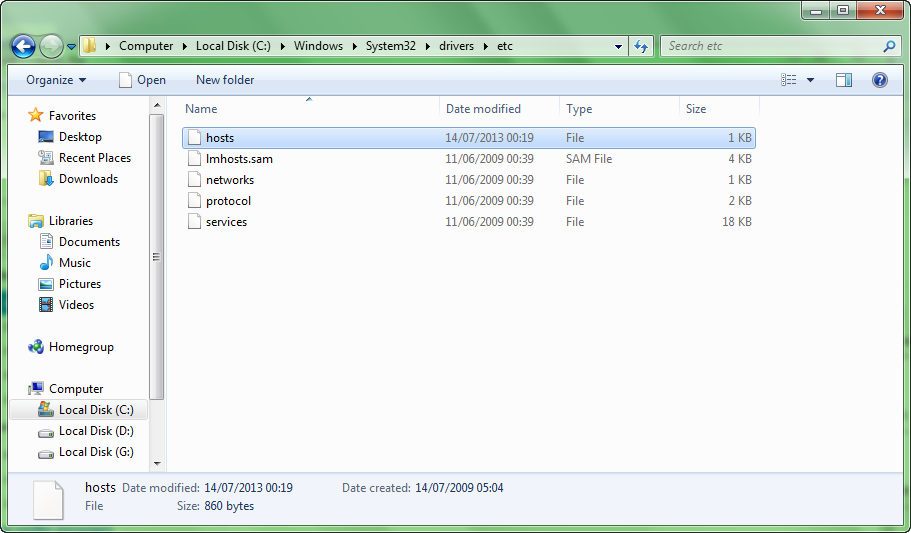
- Open My Computer and go to C:\Windows\System32\drivers\etc\
- Among the files that are located in there, right on click on the one named hosts and then Open. From the list that appears select Notepad and click OK.

- Add this line to end of the file's contents:
127.0.0.1 apps.skype.com
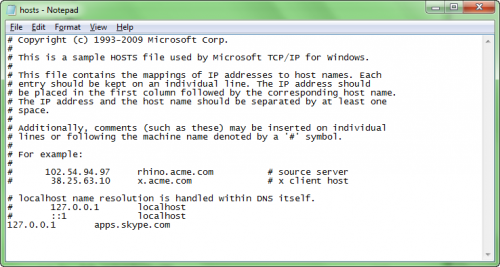
- Save the file and close it.
- Restart Skype; the ads will be gone.
That's it, now you won't have to deal with Skype's ads again. If you want to revert changes, just go back to the same steps and remove https://apps.skype.com/ from the Restricted sites (if you followed method 1), or edit the hosts file again and remove the line you added (if you followed method 2).

Bonus guide: Fix Skype not signing in automatically on Windows 10.