
How to install Windows 8.1 on dual boot alongside Windows 7
This is a simple process during which you basically need to buy Windows 8.1, put it on a DVD or USB, create a new partition for it, and install. Here's the whole process in detail:
Optional step: Trim your backup
Clean your files and folders that will be backed up in the next step. You probably accumulated a lot of pictures, documents, mp3s, etc. so go ahead and sort them, search for duplicates, delete the ones you don't need anymore. This will ensure a smaller size for your backup (therefore the backup process will be quicker) and save you some time in the long run.
Step 1: Always back up!
Although you are not deleting anything from your current OS, you never know what might go wrong during an OS install, so it's better to backup and be safe than sorry. Have a look at our backup tips or find a backup software based on our reviews in the Backup & Restore category. Are you using a cloud backup solution? I personally use Google Drive, especially since Google lowered the fees considerably.
Step 2: Buy Windows 8.1
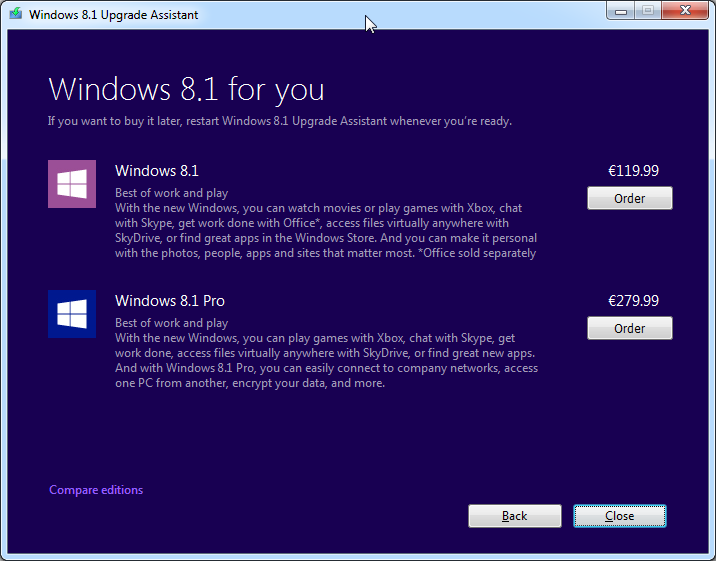
Head over to http://windows.microsoft.com/en-US/windows/buy and download the Windows 8 Upgrade Assistant. Run it. It will check your PC for compatible Apps and devices and offer you the option to buy the Standard or Pro version of Windows 8.1. Make your choice and, after the checkout process, choose 'Install by creating media' and download the ISO. You will use this ISO in the next steps.
You will also receive a serial number during the checkout process. Make a note of it as you will need it during installation in Step 5. Do not write it inside a .txt file on your Windows 7 desktop, because you will not have access to it during installation. Simply write it down on a piece of paper.
Step 3: Make a bootable DVD or USB stick with Windows 8.1 on it
After buying the Windows 8.1, you get the option to either download an ISO containing the installation or build a USB disk with the installation files. You can download the ISO and burn it to a DVD disk. Alternatively you can use this guide to build a bootable Windows 8.1 USB drive if your machine does not have a DVD drive or simply because it's more convenient to use a USB stick.
Step 4: Make a partition for the new OS
As stated in our comparison table for Windows requirements, Windows 8.1 32-bit needs 16GB of hard disk space, while the 64-bit version needs 20GB, so you need to create a new partition with at least 16GB or 20GB free space on it.
I'm more comfortable with a 100GB partition for the OS because it will get filled with installed programs and temp files, but everyone's needs are different so make the partition as big as you need it to be, based on your future use and past experiences. If you were struggling with a 16-20GB partition for your current Windows 7, then you might consider more space for your Windows 8.1 installation.
To create a new partition for Windows 8.1, launch the Disk Management tool, already built into Windows. To launch it, hit Start and type 'diskmgmt.msc' in the search, then hit Enter. Alternatively you can go to Control Panel > System and Security and click on 'Create and format hard disk partitions' under 'Administrative Tools'.
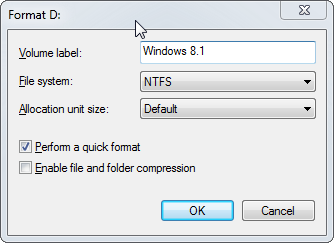
Have a look at the free space you have on your hard disks and choose one partition with enough free space on it. Right-click it and choose 'Shrink Volume'. The space you free up by shrinking this partition will appear as 'Unallocated' afterwards. After the shrinking process is over, right click the 'Unallocated' space and choose 'Format'. Proceed with the formatting using the defaults.
You should end up with something as shown below.
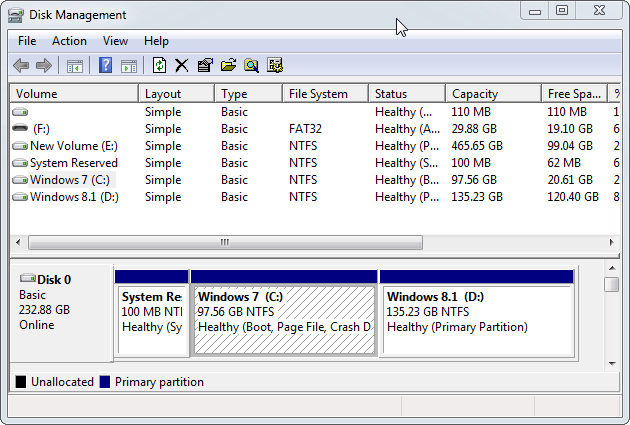
For ease of use later on, you can label the 2 partitions by right clicking on them and choosing Properties. In the empty field add something appropriate like Windows 7 and Windows 8.1.
With the Windows 8.1 DVD inside its drive, or with the Windows 8.1 USB plugged in, reboot the PC and enter BIOS.
Do this by pressing the appropriate key on your keyboard in the beginning of the booting process. It's usually Del, F2 or other. Look for a message on the screen telling you which key to press to enter BIOS. After this, search for a section about the Booting sequence and choose your DVD or USB drive as the first device to boot from. Save all changes and exit BIOS.
Some motherboards have a 'One time boot' BIOS option in which you specify the boot sequence just once without entering the BIOS. Press the appropriate key (sometimes F12) for this option if your motherboard has it, or stick with the regular BIOS configuration method from above.
If you do have the 'One time boot' option, after pressing the corresponding key (sometimes F12), you'll see something like this:

Step 6: Install Windows 8.1
After exiting BIOS, the PC will restart and it will try to boot from DVD or USB. Follow the on-screen instructions to complete the installation but pay attention to these 2 steps in particular:
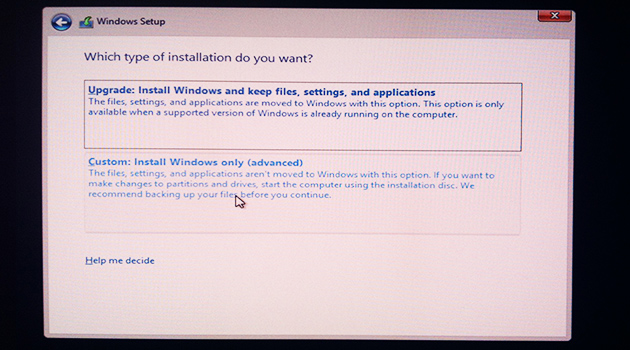
1) After entering the serial number, you'll be prompted with a choice on which type of Windows 8.1 install you wish to do: a regular install in which you update your Windows 7 to Windows 8.1, or 'Custom'. Choose Custom, do not choose 'Upgrade'.
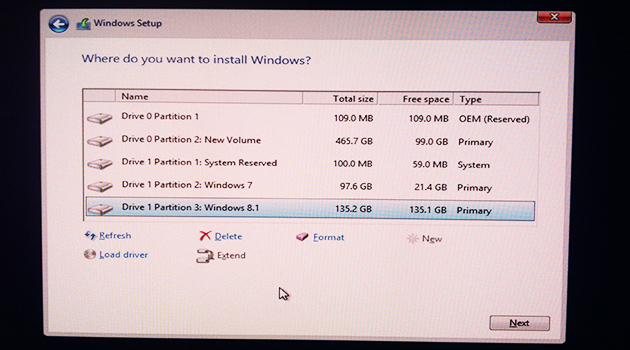
2) Following the custom installation you'll be able to choose on which partition to install Windows 8.1. Choose the partition created in Step 4, that you should have named Windows 8.1 for easier use.
Step 7: You're done
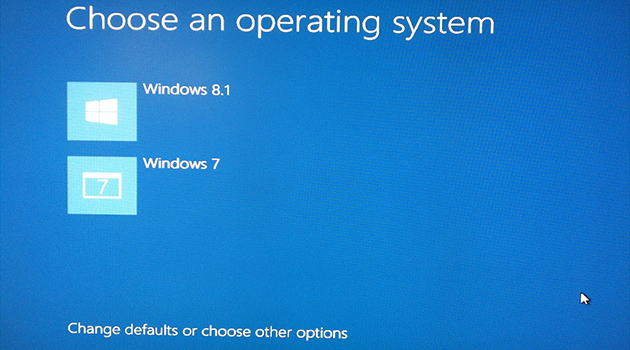
That's all there is to it. After Windows 8.1 finishes installing, it will automatically recognize during boot the 2 installed Windows operating systems. So every time you boot your PC you'll get an option to choose the OS you wish to load: Windows 7 or 8.1. By default it will load Windows 8.1, but you can change that if you wish by clicking 'Change defaults or choose other options' as shown below and choose Windows 7 as the default booting OS. While you're there, you can also lower the timer for "Choose an OS" during boot, if you wish.
If you run into trouble and have questions, or if you have suggestions on how to improve this guide, drop us a comment below.