
How to create a Windows To Go USB drive for Windows 10 Home and Pro
Have you ever heard of "Microsoft To Go"? Well, if you don't, then you might have been missing some fun all this time. Microsoft To Go is a feature that allows you to run Windows 10 (or 8/8.1/7) live from a USB drive. In other words, you install Windows on the USB drive and then you can boot it from any computer. So, you can have your own portable version of Windows 10 and carry it around with you, along with any installed programs and files you might have in it.
And if you think that the process of creating a Windows To Go USB drive is difficult, then you'd be glad to hear that it's a straightforward process, and pretty much automatic (unless you decide to do it manually). Here are three methods you can use to create a Windows To Go USB drive for Windows 10 Home and Pro:
Method 1 (Recommended): Creating a Windows To Go USB Drive for Windows 10 Home/Pro with AOMEI Partition Assistant
Method 2 (Recommended): Creating a Windows To Go USB Drive for Windows 10 Home/Pro with WinToUSB
Method 3: Creating a Windows To Go USB Drive for Windows 10 Home/Pro with GImageX
Method 1 and Method 2 are recommended, since they are the easiest; you just have to run the respective application of each method, and let it do its job. Method 3 on the other hand, requires some manual work from your end, but it's not something extraordinary that requires advanced technical knowledge.
Note: All 3 methods work for Windows 8 and Windows 8.1 in the same way. Windows 7 is also supported, but there's a chance that driver problems will occur when booting from it. Additionally, Windows 7 doesn't have built-in support for USB 3.0, therefore it has to be run from a USB 2.0 port.
So, let's begin.
Method 1 (Recommended) - Creating a Windows To Go USB Drive for Windows 10 Home/Pro with AOMEI Partition Assistant
For this method, you will need:
- AOMEI Partition Assistant (demo version works).
- Windows 10 ISO file or ESD file.
- A USB drive with 16 GB or more free space. You could use an external hard disk or SSD too, since they are faster.
That's all! Now, here's what you need to do:
Step 1: Run AOMEI Partition Assistant
After you have downloaded and installed AOMEI Partition Wizard, run it. You won't have to configure any first-time settings, so don't worry about anything like that.
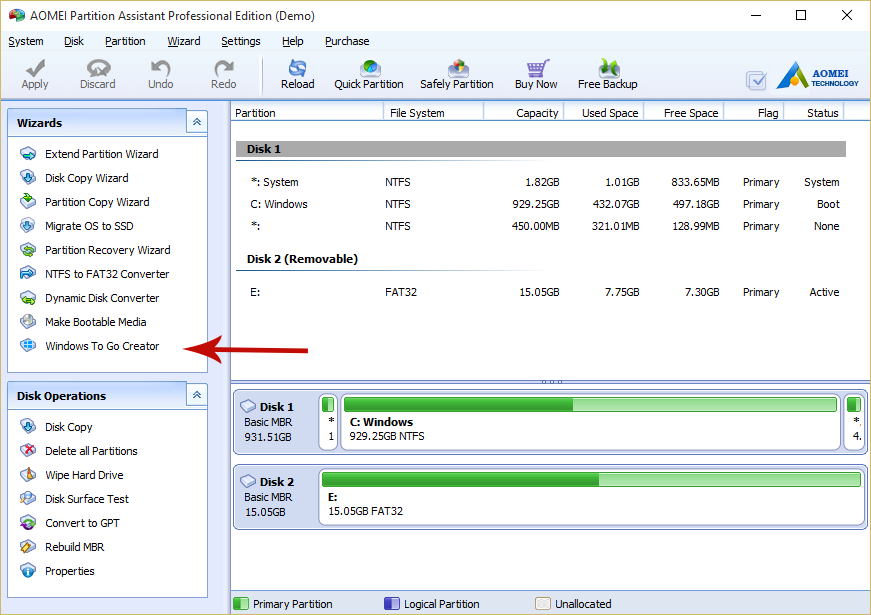
Step 3: Open Windows To Go Creator
Find Windows To Go Creator module in the pane located on the left side of the window, and click on it.
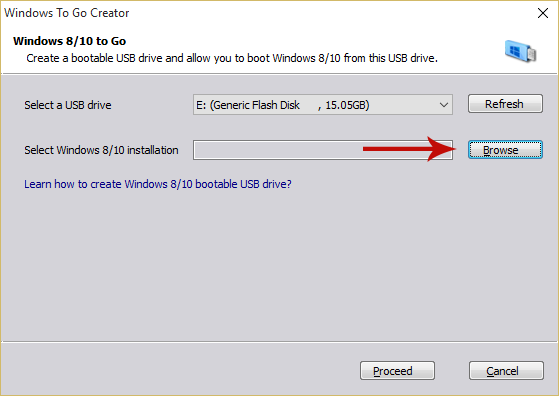
Step 4: Select the Windows 10 ISO File or ESD File
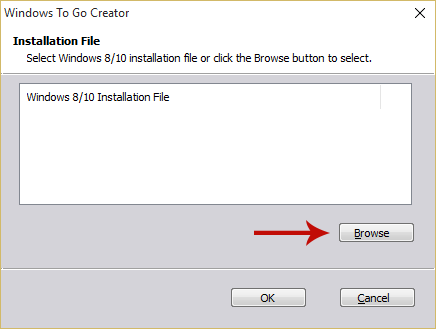
In the popup window, click Browse to select the Windows 10 ISO or ESD file that you have in your computer. A new popup window will open, and there's a chance that the program will find the file automatically; otherwise, just click Browse again and find the file manually.
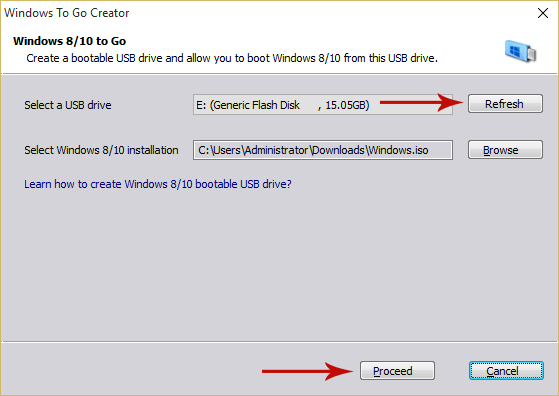
Then, make sure that the drive displayed at the top of the first popup window is the device that you want to use for this process. Then, click Proceed.
Step 5: Confirm Drive Format and Begin Creation Process
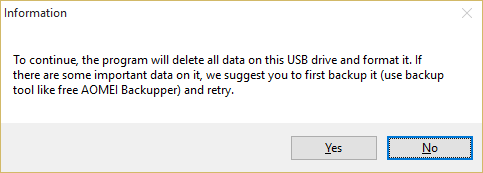
In the next step you will be asked whether you want to proceed with the process, which will initially format the drive that will be used (all files on the drive will be lost), or whether you want to cancel it in order to backup the drive's contents first. If you have no files in the drive, or don't mind them being deleted, then just click Yes and let the program proceed with the process. The drive will be formatted with the NTFS file system, and the Windows 10 (or 8/8.1) will be installed in it afterwards.
When the process is complete, you will be able to boot Windows 10 from that drive in any computer!
Method 2 (Recommended) - Creating a Windows To Go USB Drive for Windows 10 Home/Pro with WinToUSB
For this method, the following are needed:
- WinToUSB
- Windows 10 ISO file or ESD file.
- A USB drive with 16 GB or more free space. You could use an external hard disk or SSD too, since they are faster.
Let's start then:
Step 1: Open WinToUSB
Open WinToUSB after you've downloaded and installed it.
Step 2: Select Windows 10 ISO File or ESD File
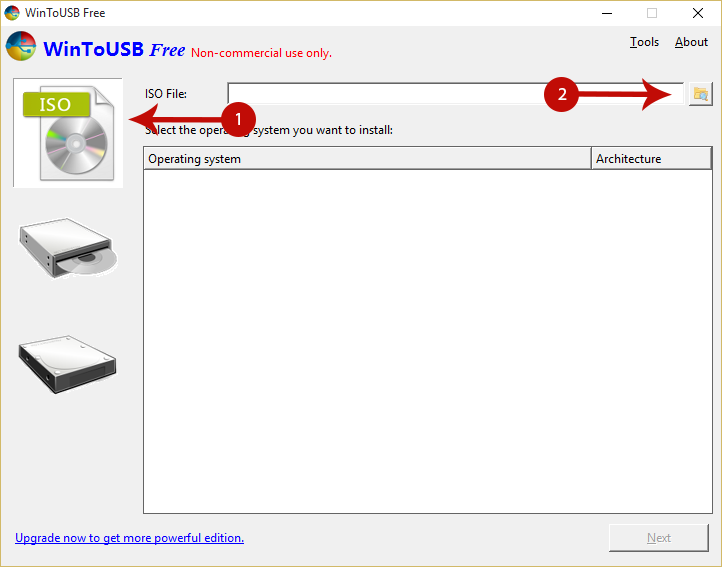
In the main window, navigate to the first module that is listed on the pane located at the left side of the window (the one with the ISO graphic on it). Then, click the button next to the ISO file textbox and browse for the Windows 10 ISO or ESD file that will be used in the process.
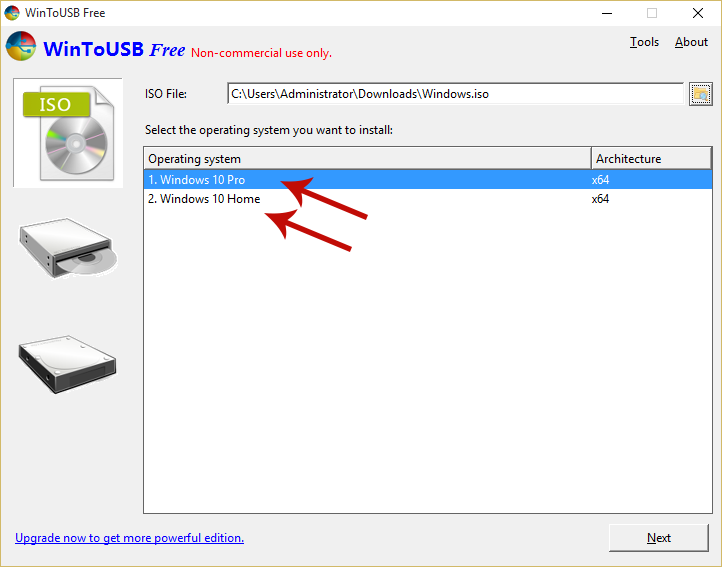
When the file has been loaded, a list of the operating systems that can be installed from that file will be displayed (e.g. Windows 10 Pro edition 32-bit (x86) and Windows 10 Pro edition 64-bit (x64)). Select which OS you would like to install, and click Next.
Step 3: Select Destination Drive and Begin Creation Process
In the next screen you will be prompted to choose which drive you want to use for the process. If you select a USB flash disk, it will be formatted in the next step. If it is a hard disk though, you will have to select the boot partition and the system partition for the installation.
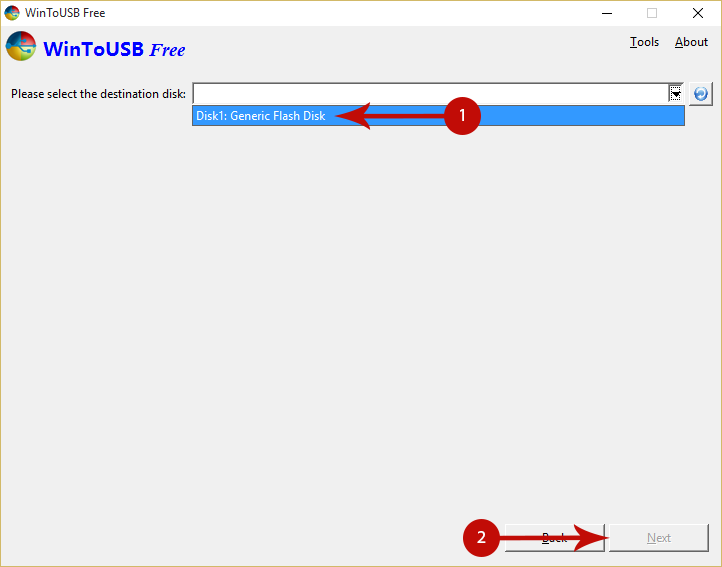
When you're done, click Next. The process of creating your Windows To Go drive will start. When it's over, you will be able to boot Windows 10 from that drive!
Method 3 - Creating a Windows To Go USB Drive for Windows 10 Home/Pro with GImageX
As we said at the beginning of this tutorial, this method requires some more effort from the user's part. But if for some reason this is your only option, don't worry- we will still guide you through all of the steps.
Here's what you will need here:
- GImageX
- Windows 10 ISO file.
- A USB drive with 16 GB or more free space. You could use an external hard disk or SSD too, since they are faster.
- A program to mount your Windows 10 ISO file, such as DAEMON Tools.
Step 1: Mount the Windows 10 ISO File
Mount the Windows 10 ISO file to a virtual drive using DAEMON Tools (or a similar program). You will then be able to view the ISO file's contents.
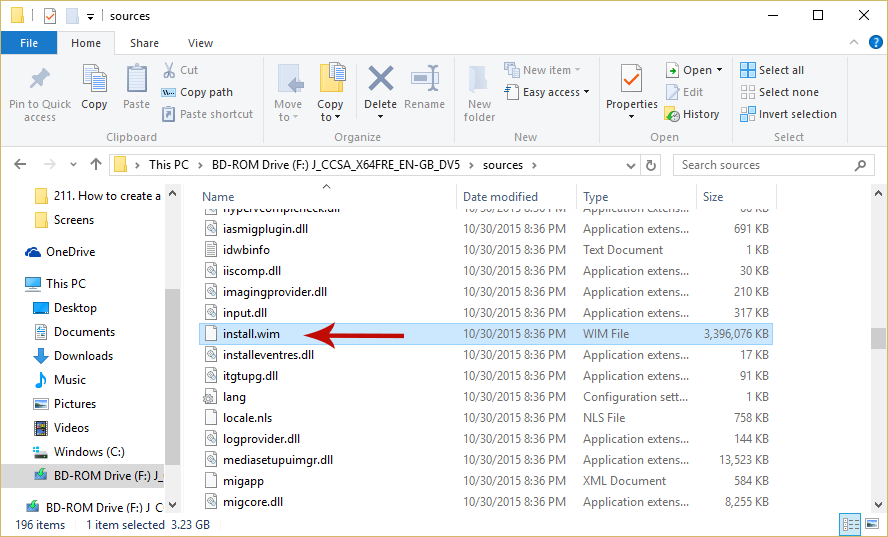
Navigate to the sources folder, and locate a file named install.wim.
Note: If the Windows 10 ISO file you have has an install.esd file instead of install.wim, then download the Windows 10 ISO file from here (scroll down where it says "Windows 10 ISO Downloads"), which has install.wim.
Step 2: Open GImageX
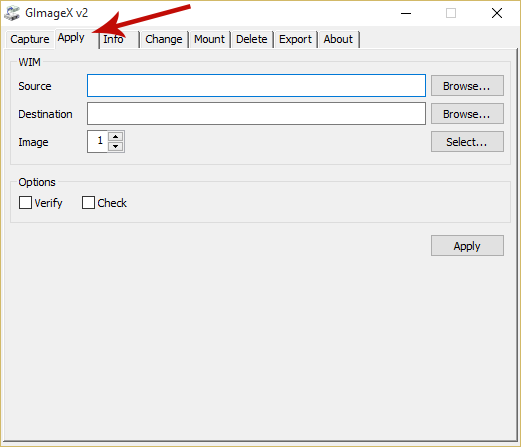
Now run the GImageX utility that you have downloaded, and navigate to the Apply tab.
Step 3: Load the .WIM File and Begin Creation Process
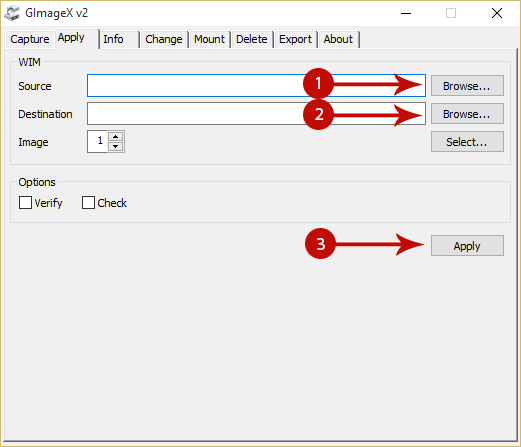
Under the Apply tab, click the Browse button located next to the Source textbox, and browse for the install.wim file that you found previously. Then, select the drive that you wish to be used for this process in the Destination box, and click Apply.
The process of creating Windows To Go drive will begin. Wait for it to finish, and then go to the next step.
Step 4: Make the Partition Active
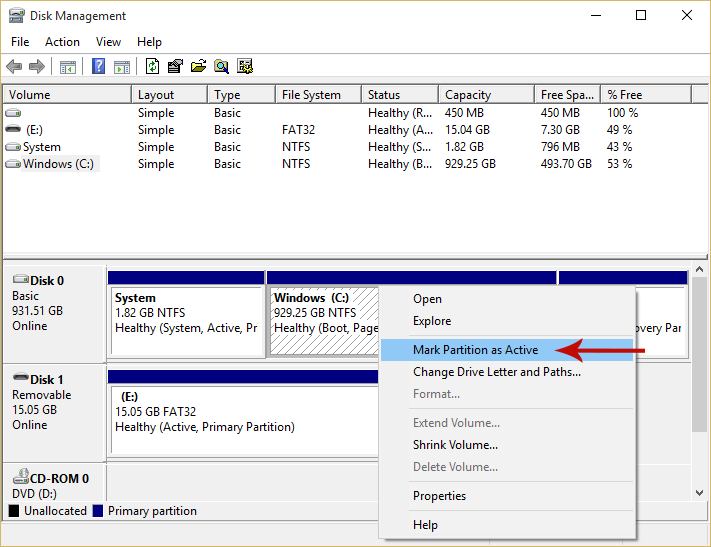
For safety reasons, the partition that was created in the drive to hold Windows 10 is disabled, so we need to enable it before we can boot from it. To do that, open Disk Management (right-click on the Start button and select Disk Management), then locate the drive/partition that you used, right-click on it and select Mark Partition as Active.
Step 5: Create Boot Entries on the USB Drive
This is the final step. What you need to do now is run a few commands in the command prompt in order to create the necessary boot entries in the drive's bootloader.
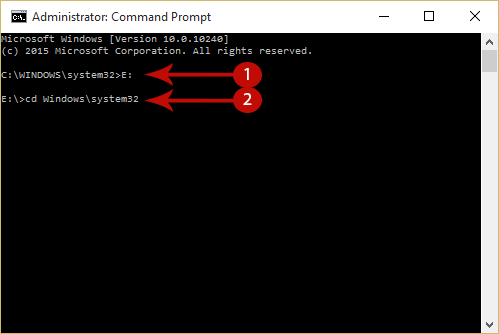
So, open an Elevated Command Prompt, and type the following commands (replace X with the letter of the Windows To Go drive, e.g. F or G or H):
X:
Press Enter, then type:
cd Windows\system32
And press Enter again.
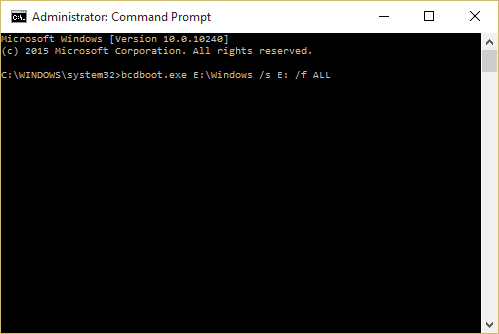
Then, type the following last command and press Enter once more (again, replace X with the letter of the Windows To Go drive):
bcdboot.exe X:\Windows /s X: /f ALL
Good job! Your Windows To Go drive is now ready! Note that the first time you boot from it, you will have to go through the first-time setup that you typically see when you run Windows 10 for the first time. But that's just for the first time- afterwards you will just boot Windows 10 normally!
If you have any questions, suggestions, or problems, then let us know in the comments section below!