
How to Run Android Apps in Windows 10 Mobile
Windows 10 has delivered many new features to its users, but those running Windows 10 Mobile on their devices have an extra advantage: the ability to run Android apps. Microsoft had stated in the past that they wanted to implement this feature in Windows 10 Mobile, and they did, so here is how you can run Android apps in your Windows Phone.
Running Android Apps in Windows 10 Mobile
First of all, below are some important notes that you should read before proceeding:
1. Not all devices running Windows 10 Mobile are able to run Android apps at this point. Below is a list of the supported devices:
- Nokia Lumia 920
- Nokia Lumia 925
- Nokia Lumia 929 / Verizon Icon
- Nokia Lumia 830
- Nokia Lumia 930
- Nokia Lumia 1520
- Nokia Lumia 635 (1GB RAM variant)
- Nokia Lumia 730
- Nokia Lumia 820
- Nokia Lumia 435
- Nokia Lumia 928
So, please don’t try following this method if your device is not included in this list since the chances of it working are pretty low, plus it might damage your device.
2. There are some users who report that this process froze their devices, and so they were required to perform a complete re-flashing in order to make them functional again. Therefore, don’t try this unless you are fully aware of the possible damage that could be done to your device.
3. Even if you succeed performing the process, you should know that not all Android apps will run correctly. If an app depends on a Google Service, which of course is not available in your Windows Phone, it will not be able to function properly.
Having read the above notes and decided you want to continue, you can now proceed to the instructions:
Step 1: Download the Required Tools
You need to download the following tools first:
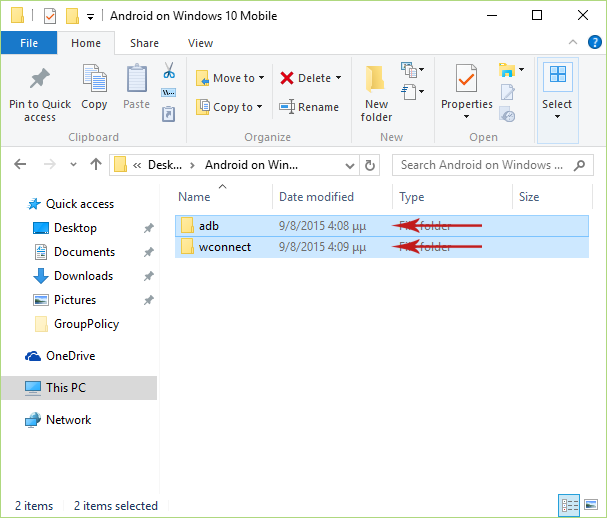
After you download the above archives, extract each one to its respective folder (i.e. folders wconnect and abd).
Step 2: Start Installing Programs
Go to the wconnect folder and install IpOverUsbInstaller.msi first. When the installation has finished, install vcredist_x86.exe as well.

Step 3: Enable “Developer Mode” and “Device Discovery” Options
In your Windows 10 Mobile device, navigate to Settings, then go to Update & security, select For Developers and enable Developer Mode and Device Discovery.

Step 4: Open an Elevated Command Prompt
Go to the wconnect folder. Now you must open an elevated Command Prompt in the current directory. To do this, you can hold the Shift key and right-click anywhere in the folder, then select Open command window here.

[Alternatively, you can follow the instructions from this article in order to open an Elevated Command Prompt and then navigate to the wconnect directory]
Step 5: Connect Your Windows Phone to the PC
Connect your device to the PC. You have two possible options for doing this (the USB method is recommended):
- Connect via USB (Recommended)
In the Command Prompt you just opened, type the following command and press Enter:
wconnect.exe usb

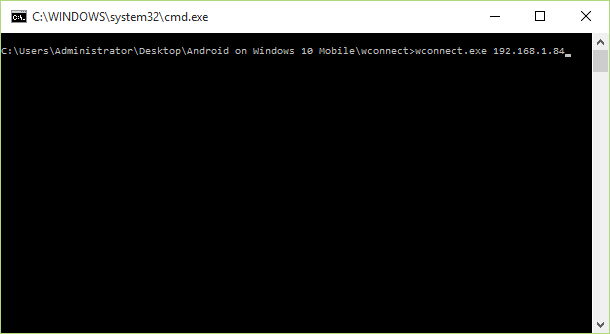
- Connect over Wi-Fi
In the Command Prompt you just opened, type the following command and press Enter:
wconnect.exe xxx.xxx.xxx.xxx
Where xxx.xxx.xxx.xxx is your local IP address (e.g. 192.168.1.84).
Once you connect your device to the PC, you will be asked to enter the pin code for the device to be paired and connected. Type the code and press Enter.
Step 6: Open One More Elevated Command Prompt
Go to the other folder you extracted earlier, the adb folder, and open an Elevated Command Prompt just like you did in Step 4.
Step 7: Display the List of Connected Devices
Make sure that your device is connected to the PC. To do this, just type the following command in the Elevated Command Prompt you just opened and then press Enter:
adb devices
This will display a list of all connected devices, including your Windows Phone.

Step 8: Install Android Apps
This is the last step. Copy the APK file you want to install to your Windows 10 Mobile device and paste it to the adb folder. Then, in the last Command Prompt you opened, type the following command and hit Enter:
adb install FILENAME.apk
Where FILENAME is the name of the APK you want to install.

When the installation process is done you should see a “Success” message in the command prompt. Then you can go ahead and run the android app in your Windows Phone.
You can install more apps afterwards. Note that if you disconnect your device, you need to follow Steps 4-8 again.
And here is a video tutorial by WPXBOX which describes the whole process of installing Android apps in Windows 10 Mobile Devices:
Again, don’t try this method if you are not willing to take the risk of damaging your device.
If you have any questions or problems regarding this topic, then leave us a message in the comments section below and we’ll help you out!