
How to Rebuild the Icon Cache in Windows 10
Windows 10, just like the previous versions of Windows, create an icon cache in which file thumbnails are saved in order to reduce load times when they are displayed. This icon cache however may become corrupted and have issues when displaying the thumbnails, which can be easily fixed either by cleaning the icon cache with a dedicated cleanup tool (such as Microsoft TweakUI) or by rebuilding the icon cache manually, as we are going to explain in this article.
We provide two methods you can use to rebuild the icon cache manually:
Method 1 (Recommended): Rebuild Icon Cache in Windows 10 Using a BAT File
Method 2: Rebuild Icon Cache in Windows 10 Using Command Line
Method 3: Rebuild Icon Cache in Windows 10 By Deleting IconCache.db
Method 1 is recommended since it’s easier because you don’t have to type any commands yourself (unlike Method 2). Method 3 is easy as well and doesn't require any advanced technical knowledge either.
Method 1 (Recommended) - Rebuild Icon Cache in Windows 10 Using a BAT File
This is the fully automatic way to rebuild the icon cache in Windows 10.
Step 1: Download the BAT File
Download Rebuild Icon Cache.bat from the link below first. It contains all commands required for rebuilding the icon cache in Windows 10.
Step 2: Run the Downloaded BAT File
Double-click on Rebuild Icon Cache.bat to run it (you may be prompted to confirm the action). Note that you have to save your work and exit all programs, because in the next step explorer.exe will be killed and your computer will be restarted afterwards.
Step 3: Rebuild Icon Cache
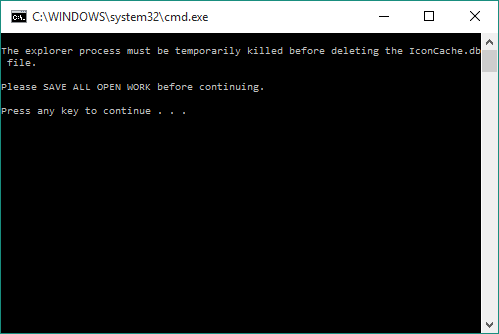
Once you run Rebuild Icon Cache.bat, a command prompt window will open and ask you to save all your work before continuing. Then, press any key to begin the rebuild process. Once it’s finished you will be asked to restart your computer- type Y for yes or N for no and hit Enter for what you would like to do.
Once your computer is restarted, all icon cache problems will probably be gone by now. If the thumbnails are still not displaying properly, then follow Step 4 below:
Step 4 (Optional): Restore Default Associations of ICO Files in Windows 10
Download and run Restore ICO File Associations.reg to restore default associations of ICO files in Windows 10, which will fix any side effects from the previous process.
Restore ICO File Associations.reg
Everything should be fine by now!
Method 2: Rebuild Icon Cache in Windows 10 Using Command Line
Method 2 is the semi-automatic way to rebuild the icon cache in Windows 10.
Step 1: Open a Command Prompt
Press Win + R ("Win" is the Windows key in your keyboard) to open the Run dialog box, type cmd in the textbox and click OK to open the Command Prompt.
Step 2: Type the Following Commands
Save your work and exit all programs, because in this step explorer.exe will be killed and your computer will be restarted afterwards.
Type/Paste the following commands one by one and hit Enter after each one:
ie4uinit.exe -ClearIconCache
taskkill /IM explorer.exe /F
DEL "%localappdata%\IconCache.db" /A
shutdown /r /f /t 00
The last command will reboot your computer.
That’s it! The icon cache will be as good as new once the computer is restarted. If you experience problems with thumbnails afterwards, follow Step 4 to fix them:
Step 3 (Optional): Restore Default Associations of ICO Files in Windows 10
Download and run Restore ICO File Associations.reg to restore default associations of ICO files in Windows 10, which will fix any side effects from the previous process.
Restore ICO File Associations.reg
Method 3: Rebuild Icon Cache in Windows 10 By Deleting IconCache.db
This method is quite easy and quick. All you need to do here is find a file named IconCache.db in your computer, delete it and then reboot.
Step 1: Open File Explorer
First open File Explorer from the taskbar.
![]()
Step 2: Make Sure Hidden Items are Shown
From the menu bar at the top click the View tab and check the "Hidden Items" option.

Step 3: Navigate to 'Local' Folder
Go to the following directory in your computer (assuming C is the drive in which Windows 10 is installed) and replace UserName with the current user's name:
C:\Users\UserName\AppData\Local

Step 4: Delete IconCache.db
Inside the Local folder that you're currently in, locate IconCache.db and delete it. Then empty the recycle bin.

Step 5: Restart your PC
Restart your computer to finish the process. The icon cache will be rebuilt next time you log into Windows 10!
[Credit: Shawn Brink from TenForums]
If Windows 10 still has problems displaying icons, then let us know by posting in the comments section below and we'll try to help you out!