
How to Fix Common Audio Issues in Windows 10
Windows 10 is certainly an improvement over Windows 8.1- at least that’s what the majority of its users has to say. But this doesn’t mean that there are no problems with the new OS; in fact, some of its issues are pretty common. That’s why Microsoft redesigned and organized its support page to cover as many as topics as possible in order to help those who are having problems.
One the most common issues users usually have are audio and playback issues. For them, Microsoft released a small number of videos explaining how to troubleshoot audio issues in Windows 10, which we present below along with written instructions and screenshots for each case.
For easier navigation, click on one of the links below to jump on a particular topic:
- Introduction to Troubleshooting Audio Issues in Windows 10
- How to Run the Audio Troubleshooter in Windows 10
- How to Use the Device Manager to Look for Audio Issues in Windows 10
- How to Change the Default Playback Format in Windows 10
- How to Change the Default Playback Device in Windows 10
- How to Turn Off Sound Enhancements in Windows 10
Introduction to Troubleshooting Audio Issues in Windows 10
The first video gives you an overview of the things you can do when you're experiencing sound problems. If you're an experienced user you probably know most/all of all this stuff, but it's really helpful for the inexperienced ones:
Next, we move on to the instructions for troubleshooting common audio issues:
How to Run the Audio Troubleshooter in Windows 10
The troubleshooter might be able to fix your problem automatically, so here’s how to run it:
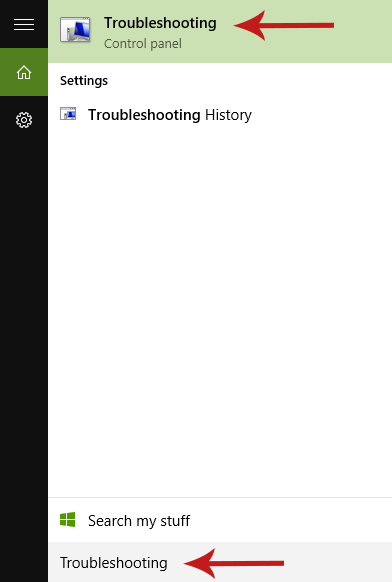
1. Open the Start menu, type “troubleshooting” (without quotes) and open the Troubleshooting screen from the results.
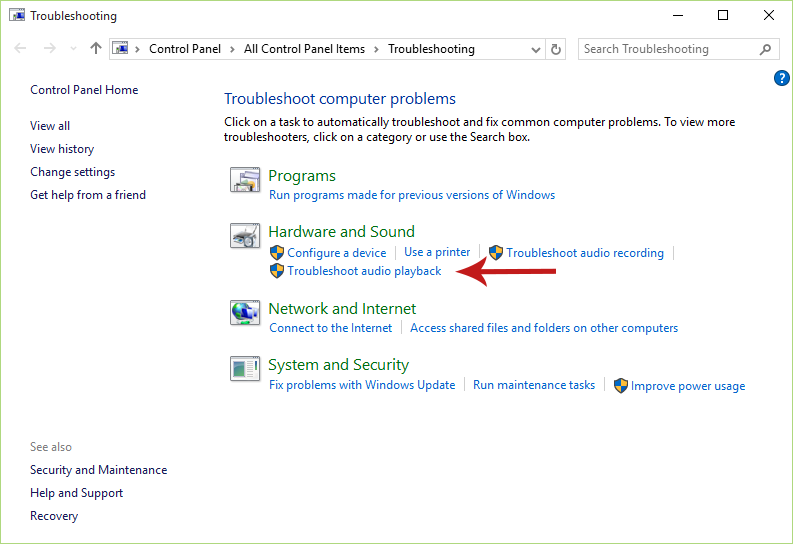
2. In the Troubleshooting window, select Troubleshoot audio playback under the Hardware and Sound settings group in order to open the Audio Troubleshooter (you might be prompted to confirm admin rights at that point, so click Yes in that case).
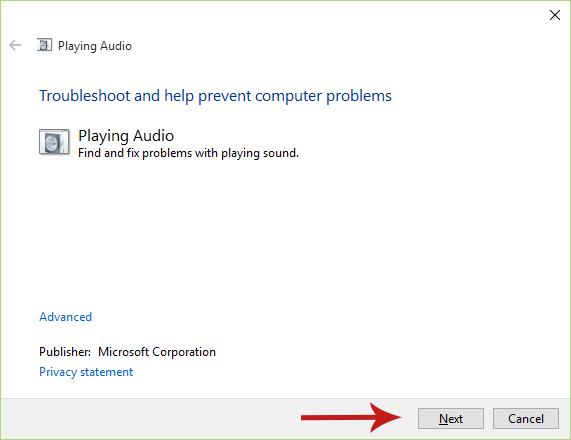
3. Click Next in the Audio Troubleshooter to let it scan your system for audio issues. If it finds any problems, it will automatically try and fix them.
4. When the scan is over you will see a report which includes the found issues and whether the troubleshooter was able to fix them or not. You can then close the program.
How to Use the Device Manager to Look for Audio Issues in Windows 10
Using the Device Manager to troubleshoot audio problems is next:
Updating the Drivers of your Audio Device
1. Open the Start menu, type “Device Manager” (without quotes) and open it from the results.

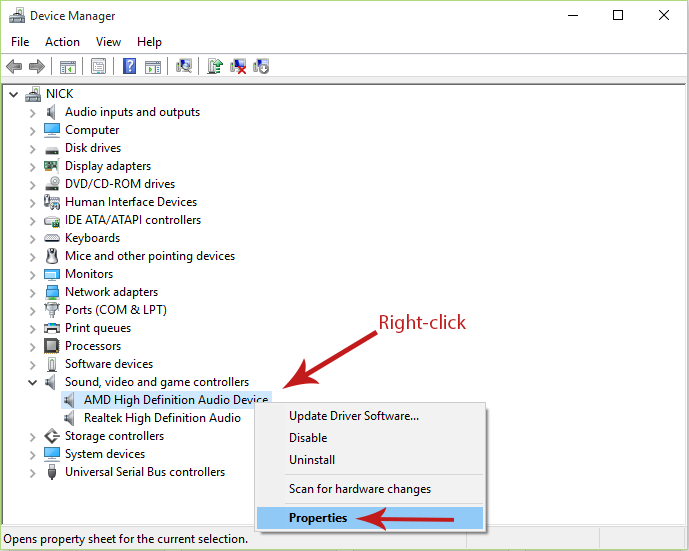
2. In the Device Manager window, expand the Sound, video and game controllers item and double-click on your sound card to open its Properties window.
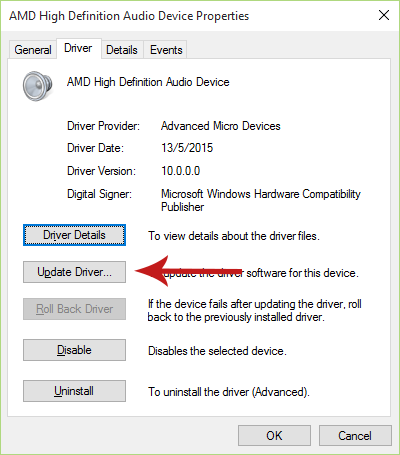
3. In the Properties window go to the Driver tab and then select Update Driver.
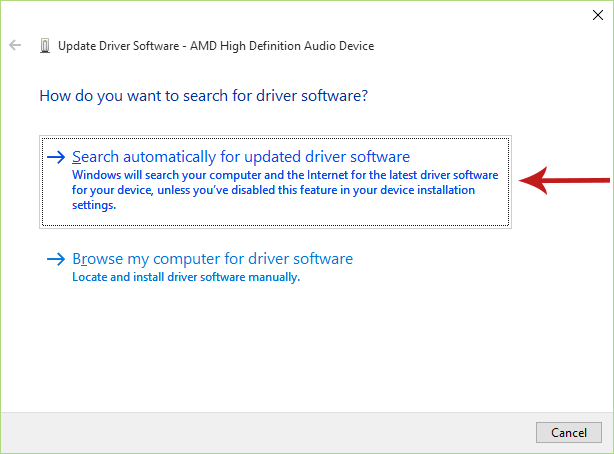
4. Select Search automatically for updated driver software in the window that opens and let Windows search for an updated driver of your audio device. If it fails to find one, then you can go to the website of your audio device’s manufacturer and see if they provide a driver there (and instructions for installing it).
If there are no new drivers for your audio device, then you can try uninstalling and reinstalling it:
Reinstalling the Drivers of your Audio Device
1. Open the Start menu, type “Device Manager” (without quotes) and open it from the results.
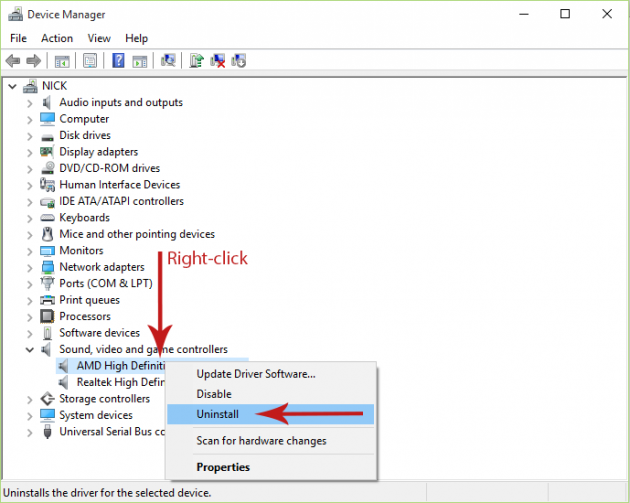
2. In the Device Manager window, expand the Sound, video and game controllers item and right-click (or tap and hold) your sound card to open the context menu. From there, select Uninstall.
3. Restart your device, and Windows will then reinstall its drivers.
If reinstalling the drivers doesn’t fix the issue, there is a chance that the device will work properly if you install the generic audio drivers that come with Windows 10. Here’s how to do it:
Installing Windows’ Generic Audio Drivers
1. Open the Start menu, type “Device Manager” (without quotes) and open it from the results.
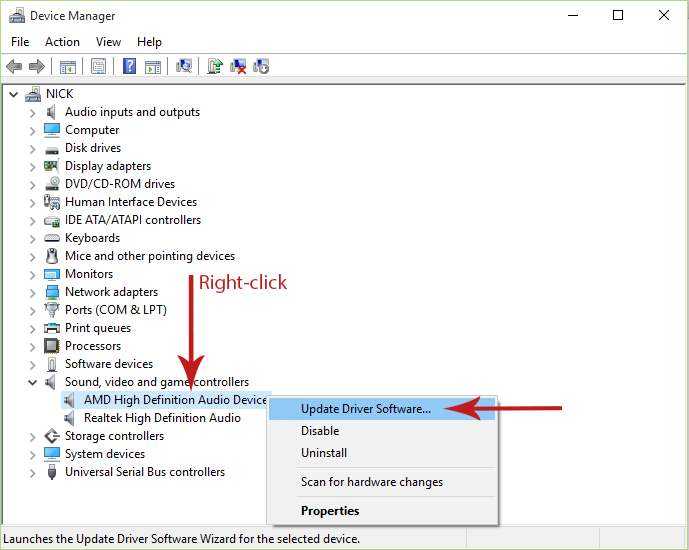
2. In the Device Manager window, expand the Sound, video and game controllers item and right-click (or tap and hold) your sound card to open the context menu. From there, select Update Driver Software.
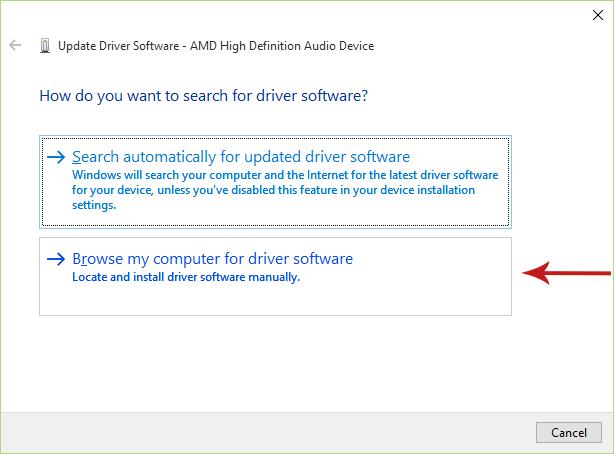
3. From the window that opens select Browse my computer for driver software.
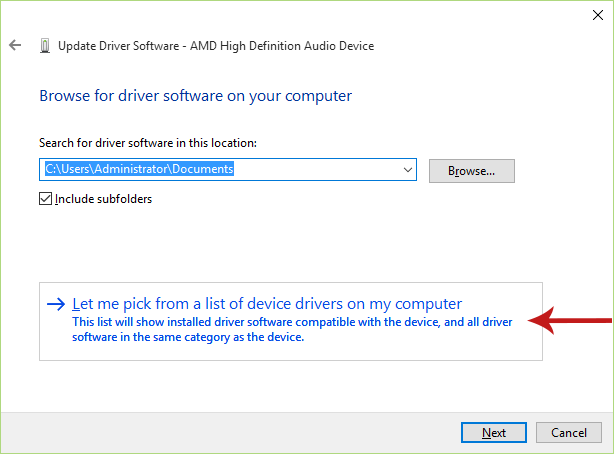
4. In the next screen select Let me pick from a list of device drivers on my computer.
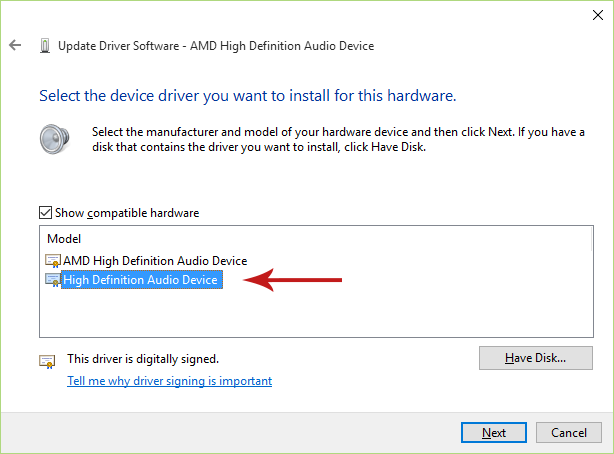
5. Select High Definition Audio Device from the list of available drivers in the next screen, and click Next. Click Yes in the confirmation message that appears and let Windows install the driver.
How to Change the Default Playback Format in Windows 10
Here is how you can change the default device playback format:
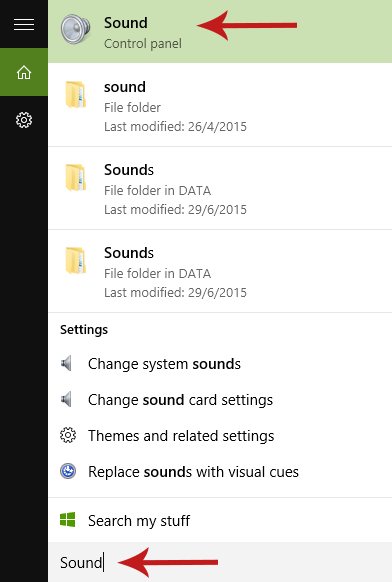
1. Open the Start menu, type “Sound” (without quotes) and open it from the list of results.
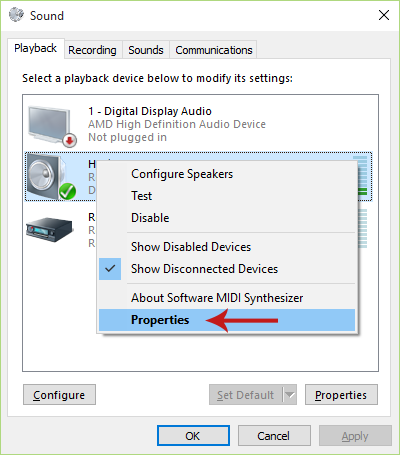
2. In the window that opens, under the Playback tab, right-click (or tap and hold) the default playback device and select Properties from the context menu.
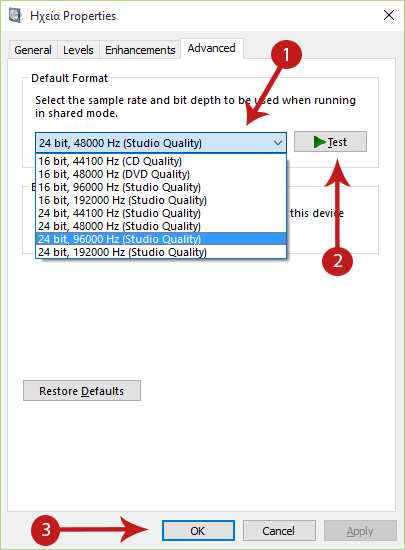
3. From the Properties window, go to the Advanced tab. Under Default Format, open the dropdown menu and change the default playback format to something else. Click the Test button next to the dropdown menu to see if sound is played correctly. If not, change the format again, until it works. Click OK to save changes.
How to Change the Default Playback Device in Windows 10
Follow the instructions below to change the default audio device in Windows 10:
1. Open the Start menu, type “Sound” (without quotes) and open it from the list of results.
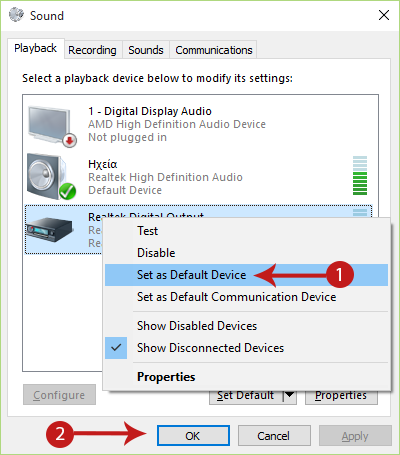
2. In the window that opens and under the Playback tab, right-click (or tap and hold) the device you want to set as the default, and select Set as Default Device. Then click OK for the changes to take effect.
How to Turn Off Sound Enhancements in Windows 10
It might not be something obvious, but sound enhancements could be the root of your audio problems. Here is how to disable sound enhancements in Windows 10:
1. Open the Start menu, type “Sound” (without quotes) and open it from the results.
2. Under the Playback tab in the window that opens, right-click (or tap and hold) the default audio device and select Properties.
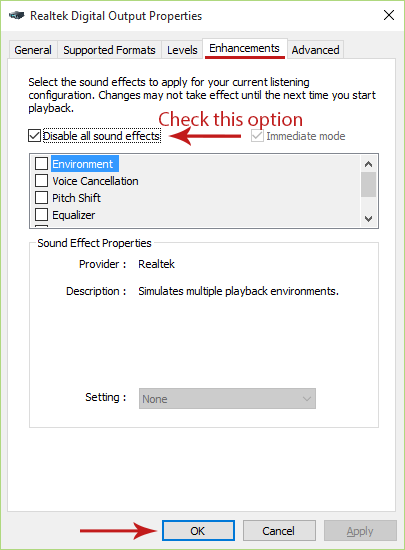
3. In the new window that opens, navigate to the Enhancements tab and check the Disable all enhancements checkbox. Then click the Preview button to see if audio is played correctly now. Click OK when you're done.
Note: You might not see an Enhancements tab in your audio device's Properties window, since some audio devices/hardware and their drivers do not support audio enhancements.
Hopefully these solutions helped you fix your audio and playback issues. If you are experiencing any problems or have a question, then let us know in the comments section below and we’ll try to help you out!